Introduction
Safe{Wallet} requires robust security measures to protect its multi-signature operations. Common challenges include centralized signing environments, limited transaction visibility on the transactions being signed, and insufficient risk control capabilities. With Cobo Portal, you can create MPC or Web3 Wallet addresses as Signers of your Safe{Wallet}, utilizing a separate and secure signing interface to reduce the risk of single-point failures. Configure message signing policies to set approval quorum so that the Signer addresses will only execute message signing after the required number of approvers have approved it. After the configuration, Cobo Portal automatically starts to monitor the Safe Transaction Service and when detecting a pending transaction, decodes the message and marks high-risk factors, providing approvers with complete visibility into what they’re approving.Steps
Prerequisite: Ensure that you have created your multisig wallet on the Safe{Wallet} official website before proceeding with the following steps.
Step 1: Create MPC or Web3 Wallet addresses on Cobo Portal
We recommend creating a dedicated wallet specifically for Safe{Wallet} message signing, separate from wallets used for other business purposes. This separation makes policy management more straightforward and enhances security.
- Create an MPC Wallet.
- Click into your wallet. Select the Addresses tab. Click Add Address, and for Network, select All EVM Networks.
- Create a Web3 Wallet.
- Click into your wallet. Click Create Address, and for Network, select All EVM Networks.
Step 2: Create a Safe{Wallet} message signing policy on Cobo Portal
In this step, you will map Signers (Cobo Portal addresses you created in Step 1) to your Safe{Wallet} addresses and set approval quorum. The Signer address will only execute message signing after the required number of approvers have approved it. If any approver rejects the request, the message signing request will be blocked by the policy.You don’t need to add Cobo Portal wallet addresses as Signers in your Safe{Wallet} at this point. You will do this in Step 4 after completing the policy setup.
- Log into Cobo Portal.
- Click Transaction Policies in the left sidebar.
- Click Create Policy > Message Signing.
- Enter a policy name (maximum 30 characters).
- Select applicable networks. Select the EVM chain where your Safe{Wallet} is deployed. You cannot select Any or non-EVM chains.
-
Under Applicable Wallets, select the MPC or Web3 Wallets and addresses you created in Step 1.
These addresses will become Signers of your Safe{Wallet} so you must select specific addresses instead of Any Address.
-
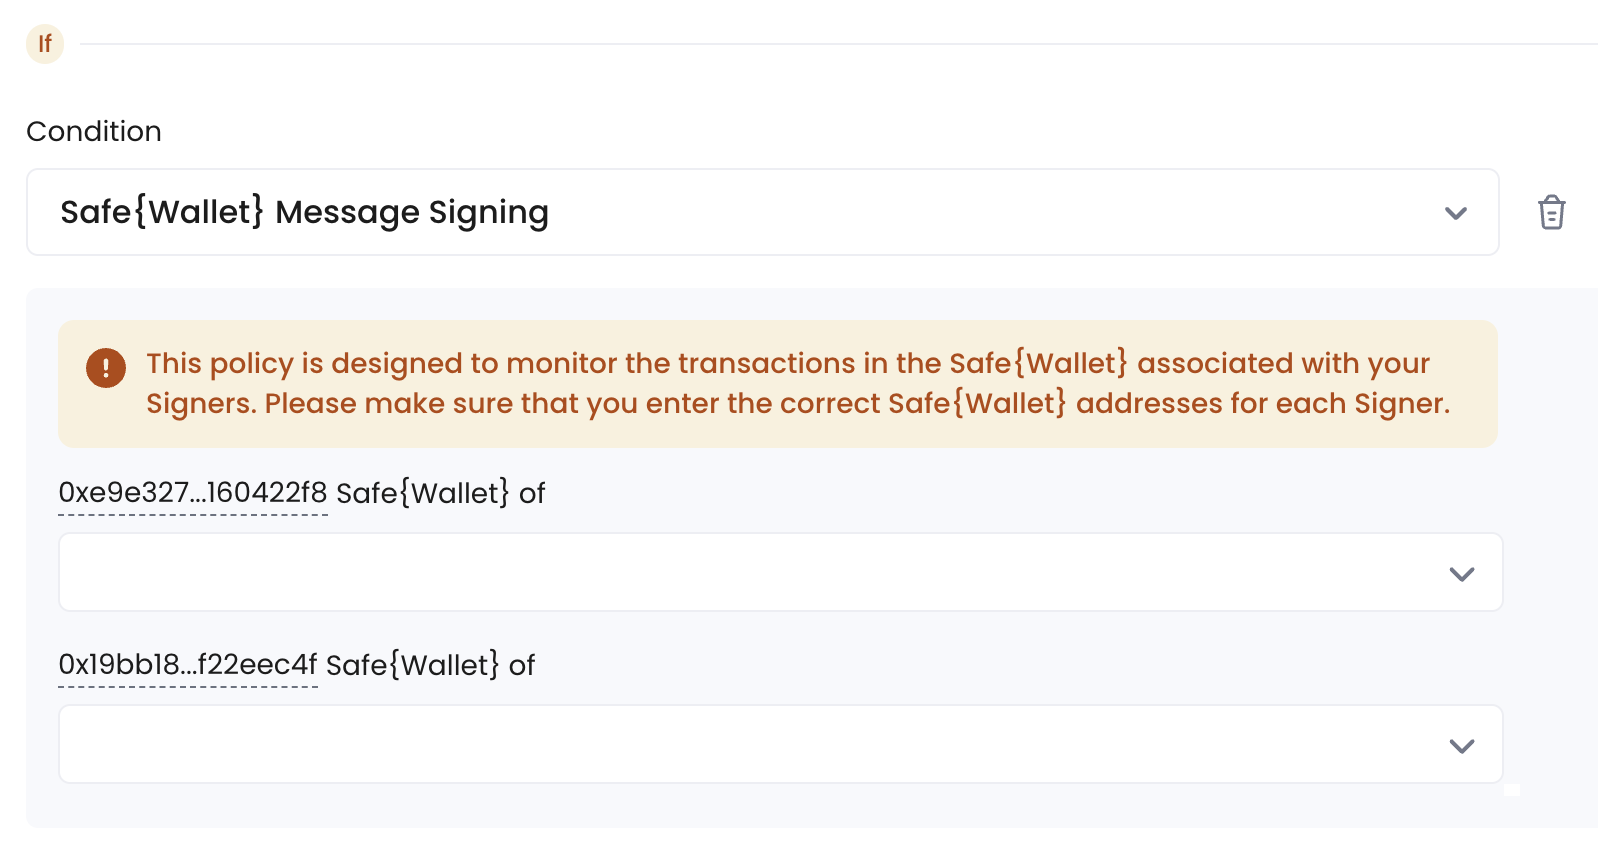
Under If, click + Add Condition and select Safe{Wallet} Message Signing. Map your Cobo Portal addresses (selected in Applicable Wallets) to the Safe{Wallet} addresses that they will sign for. The policy will be triggered when these Safe{Wallet} addresses request signatures.
For security reasons, the condition Safe{Wallet} Message Signing cannot be combined with other conditions such as Initiators and Message Type in a policy. This ensures that your Safe{Wallet} message signing is protected by a dedicated policy.
- Under Then, configure the Approval Quorum requirements by selecting approvers (by User Roles or Users) and setting the required number of approvals. Click Next.
- Review the policy you just configured, then click Next.
-
Review the order of your policies. Transactions will be matched with policies in the list based on their priority order.
- Once a higher-priority policy is triggered, subsequent policies will no longer be triggered.
- By default, the newly created policy will be placed at the top of the policy list and highlighted. You can change the order by dragging and dropping.
- Click Submit and complete the 2FA verification.
After the policy is configured, Cobo Portal automatically starts monitoring the Safe Transaction Service to look for pending transactions from the corresponding Safe{Wallet}.
Step 3: Create fallback policies
For comprehensive protection, create three fallback policies and place them below your Safe{Wallet} message signing policy from Step 2. These policies act as a safety net by automatically rejecting any requests not covered by that message signing policy.- Message signing fallback policy:
- Applicable Network: Select Any
- Applicable Wallets: Select the wallets containing your Signer addresses and select Any addresses. Alternatively, if you don’t use your wallets for message signing for other business purposes, you can select All Wallets for Applicable Wallets.
- Condition: Skip adding any conditions to cover all message signing requests
- Action: Select Auto rejection
- Contract call fallback policy:
- Under Applicable Wallets, select the wallets containing your Signer addresses
- Under Applicable Network, select Any
- Condition: Skip adding any conditions to cover all contract calls
- Action: Select Auto rejection
- Token transfer fallback policy:
- Under Applicable Wallets, select the wallets containing your Signer addresses
- Condition: Skip adding any conditions to cover all token transfers
- Action: Select Auto Rejection
Step 4: Add Cobo Portal addresses as Signers on Safe{Wallet}
After setting up your policies, go to your Safe{Wallet} and add your Cobo Portal wallet addresses as Signers:-
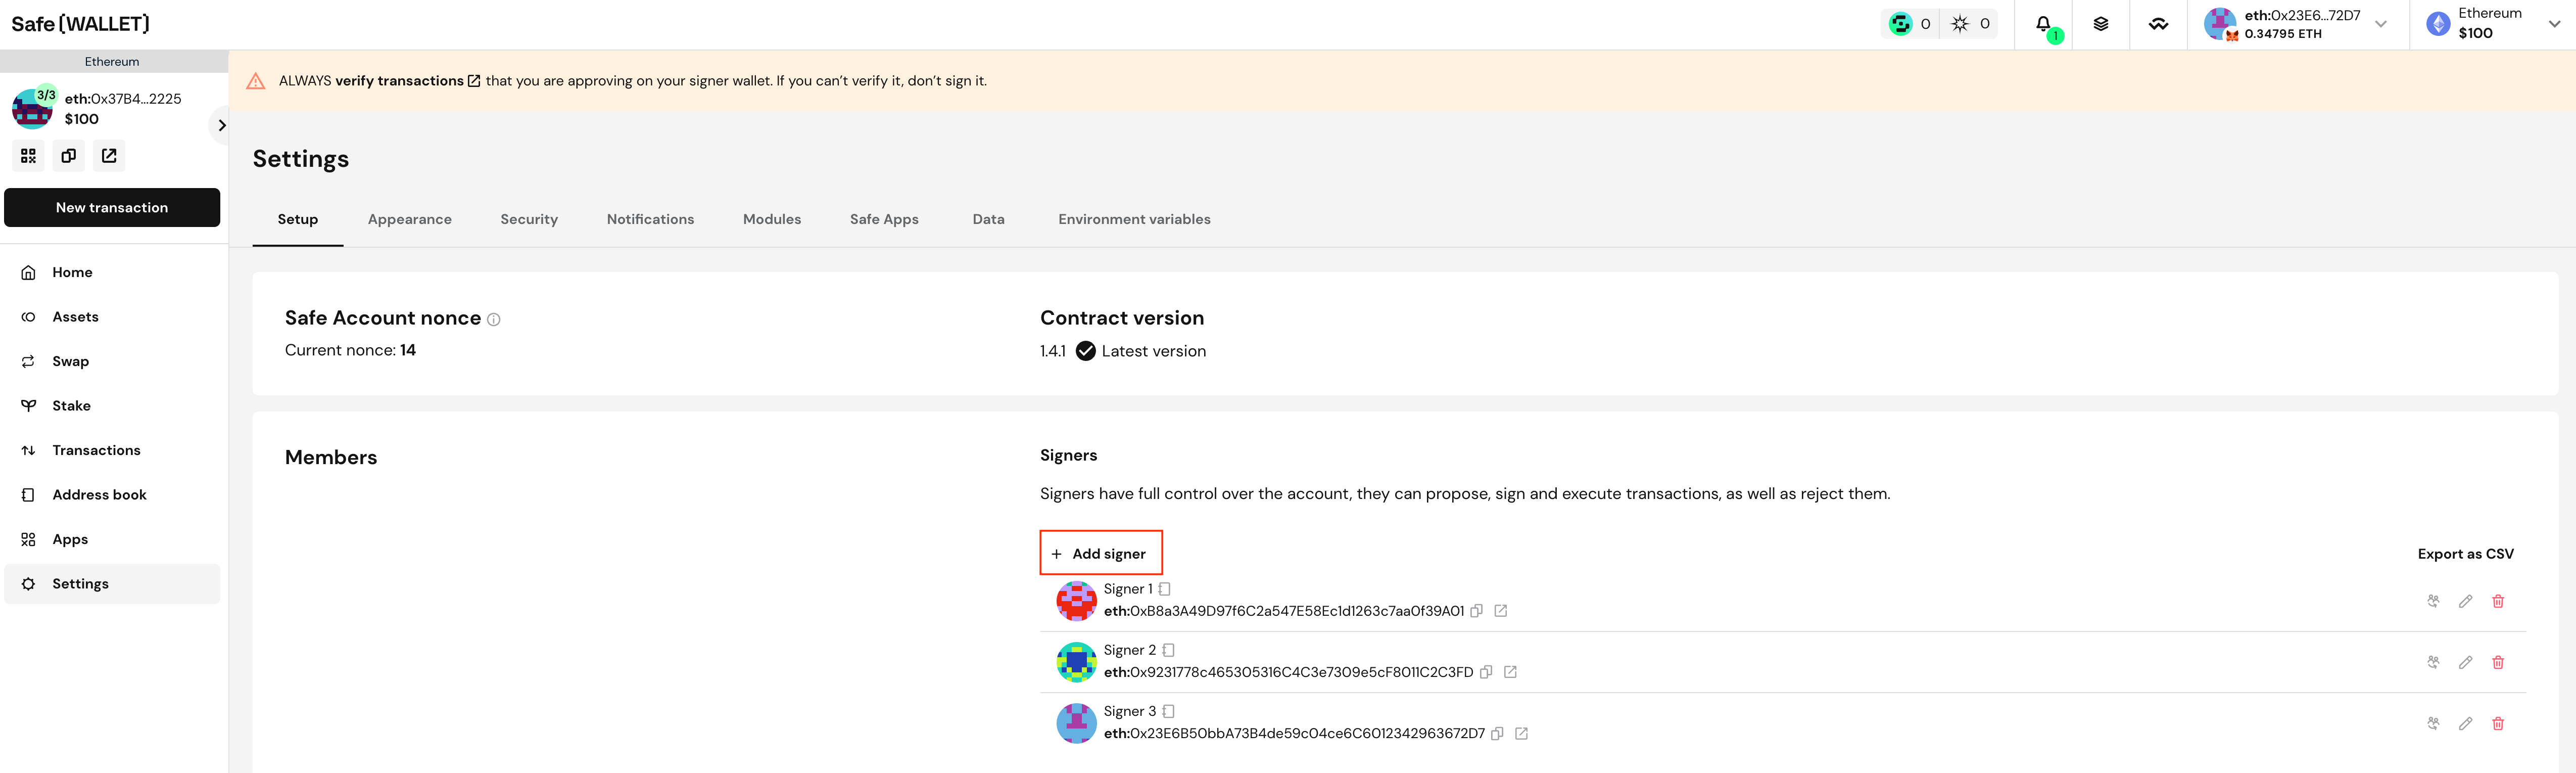
In your Safe{Wallet}, navigate to Settings and locate the Members section. Click + Add signer.
-
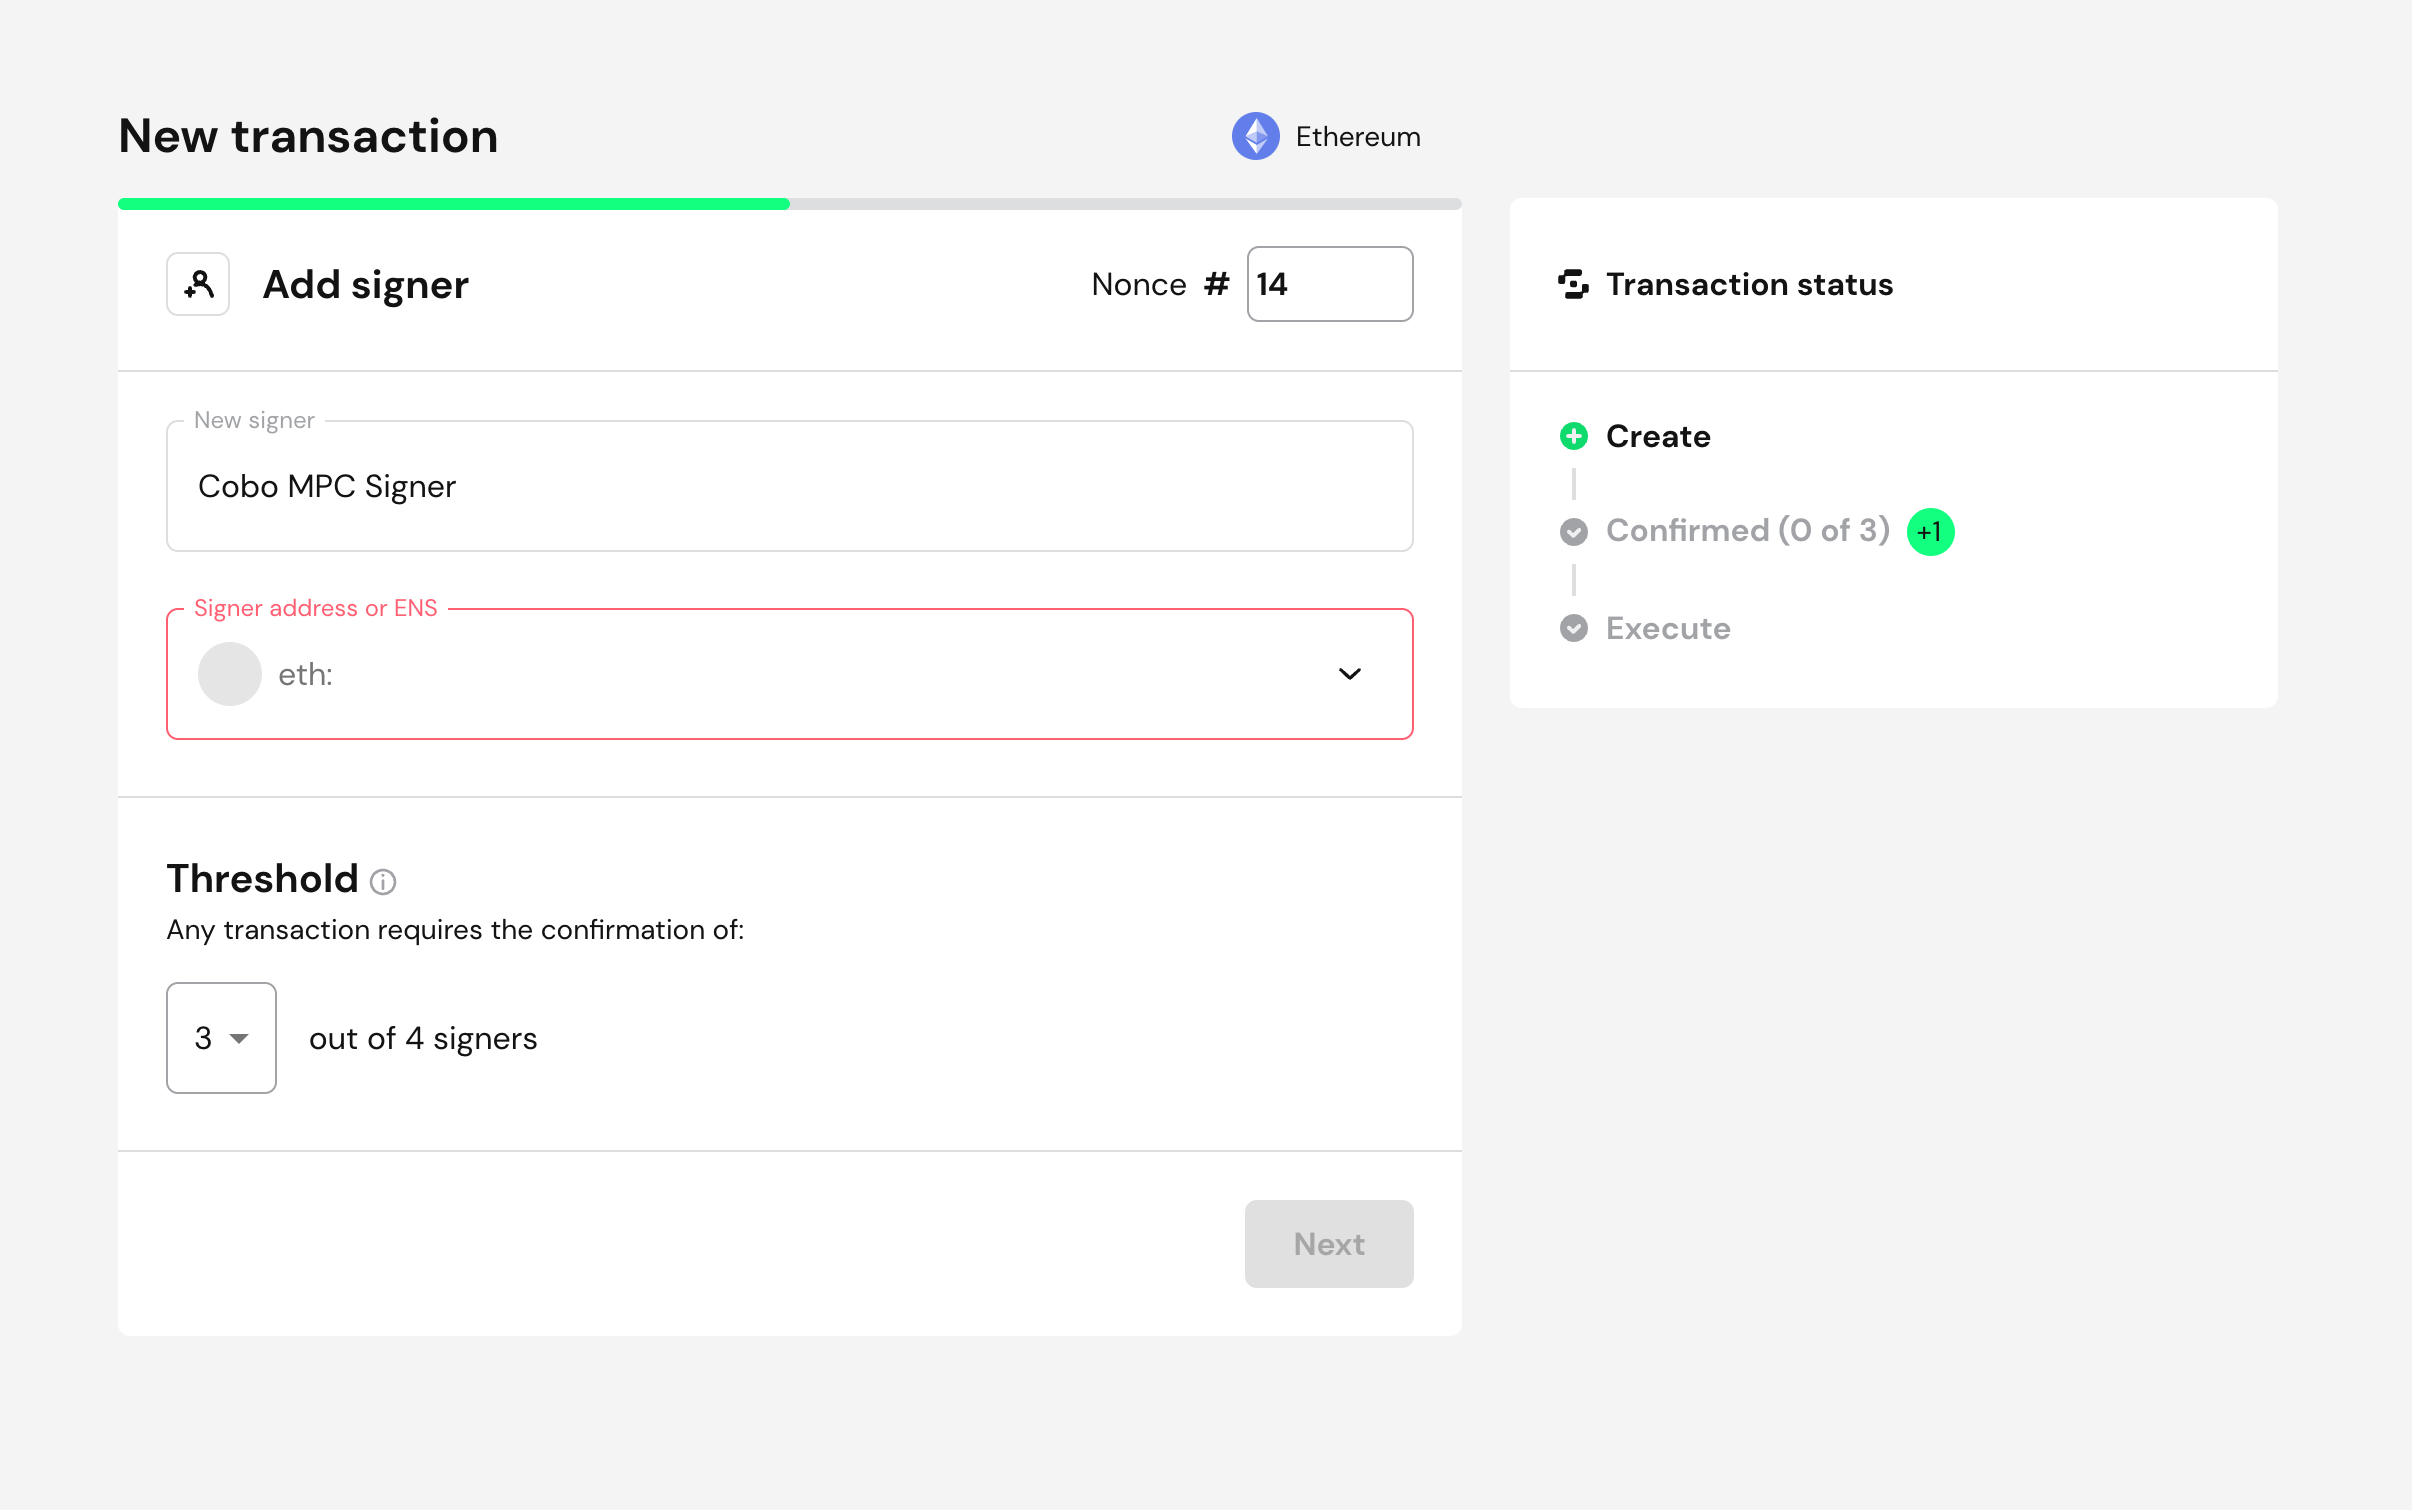
Enter the Cobo Portal wallet address that you want to add as a signer, change the threshold if needed, and click Next.
- Sign and execute the transaction to implement your changes.
Step 5: Initiate Safe{Wallet} transactions
Safe{Wallet} transactions can be initiated in two ways:- Initiate transactions using Safe{Wallet} dApp connected via Cobo Connect
- Other Signers initiate a transaction
Step 6: Approvers review transactions on Portal Mobile
As mentioned previously, after the message signing policy is configured, Cobo Portal automatically monitors the Safe Transaction Service. When a pending transaction is found for the corresponding Safe{Wallet}, Cobo Portal initiates a signature request and starts the risk control process. Approvers will receive a notification in their Portal Mobile App to review the request. The Signer address will only execute message signing after the required number of approvers (set in the approval quorum in the message signing policy) have approved it. If any approver rejects the request, the message signing request will be blocked by the policy. The Portal Mobile interface provides comprehensive information and alerts:- Provides detailed transaction information with decoded parameters
-
For multiSend transactions, an All Actions section displays bundled operations, each showing as
Contract Name: Method Namewith a sequence number.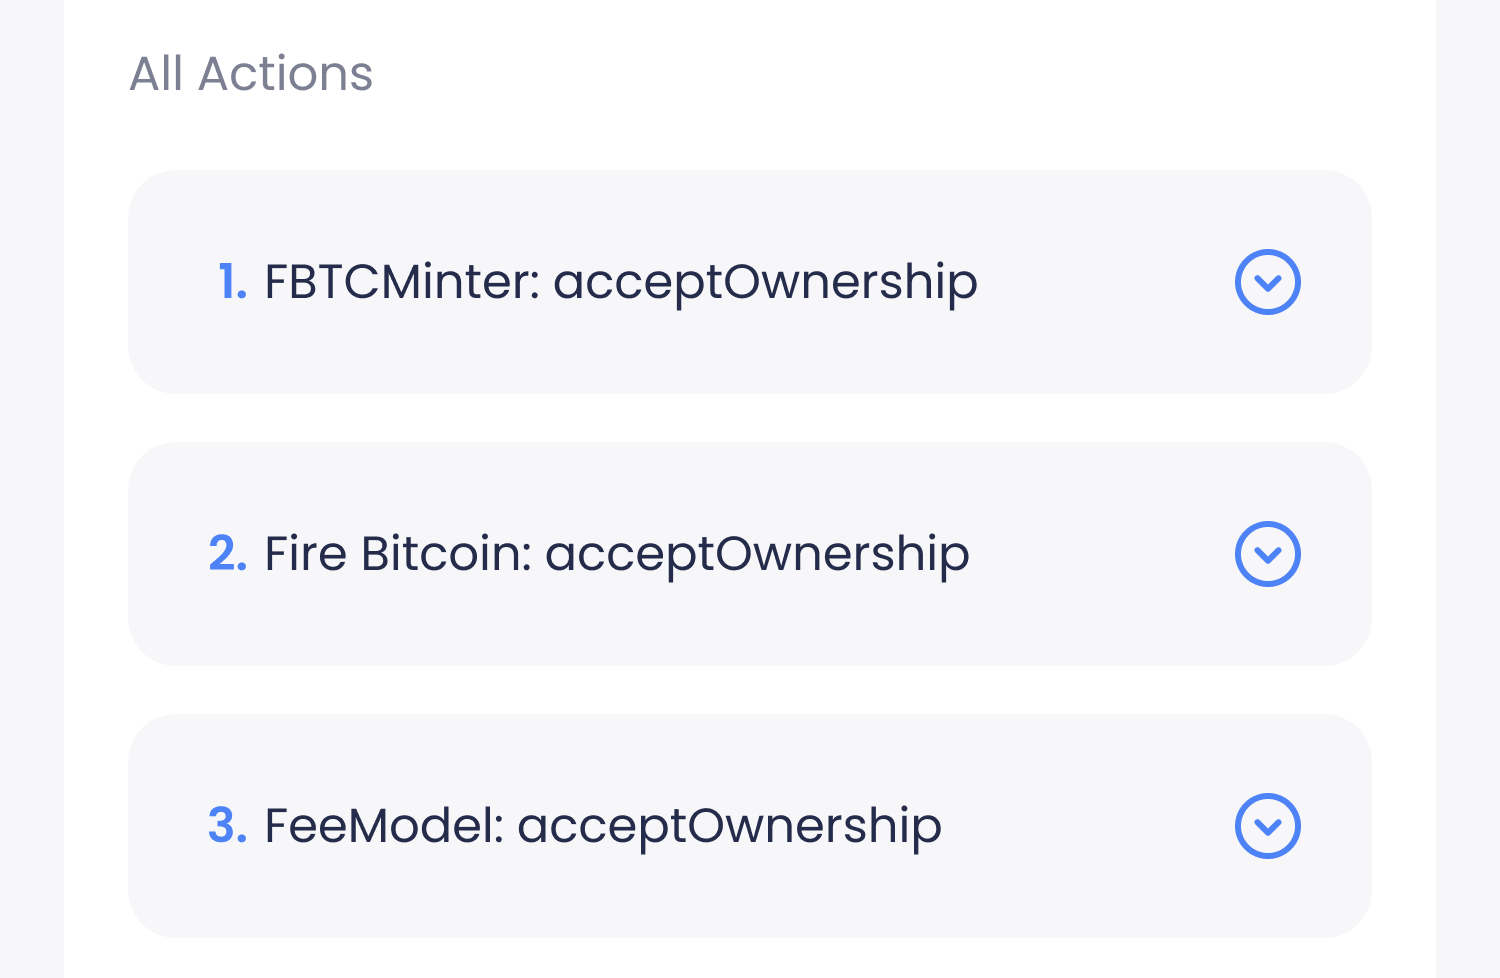
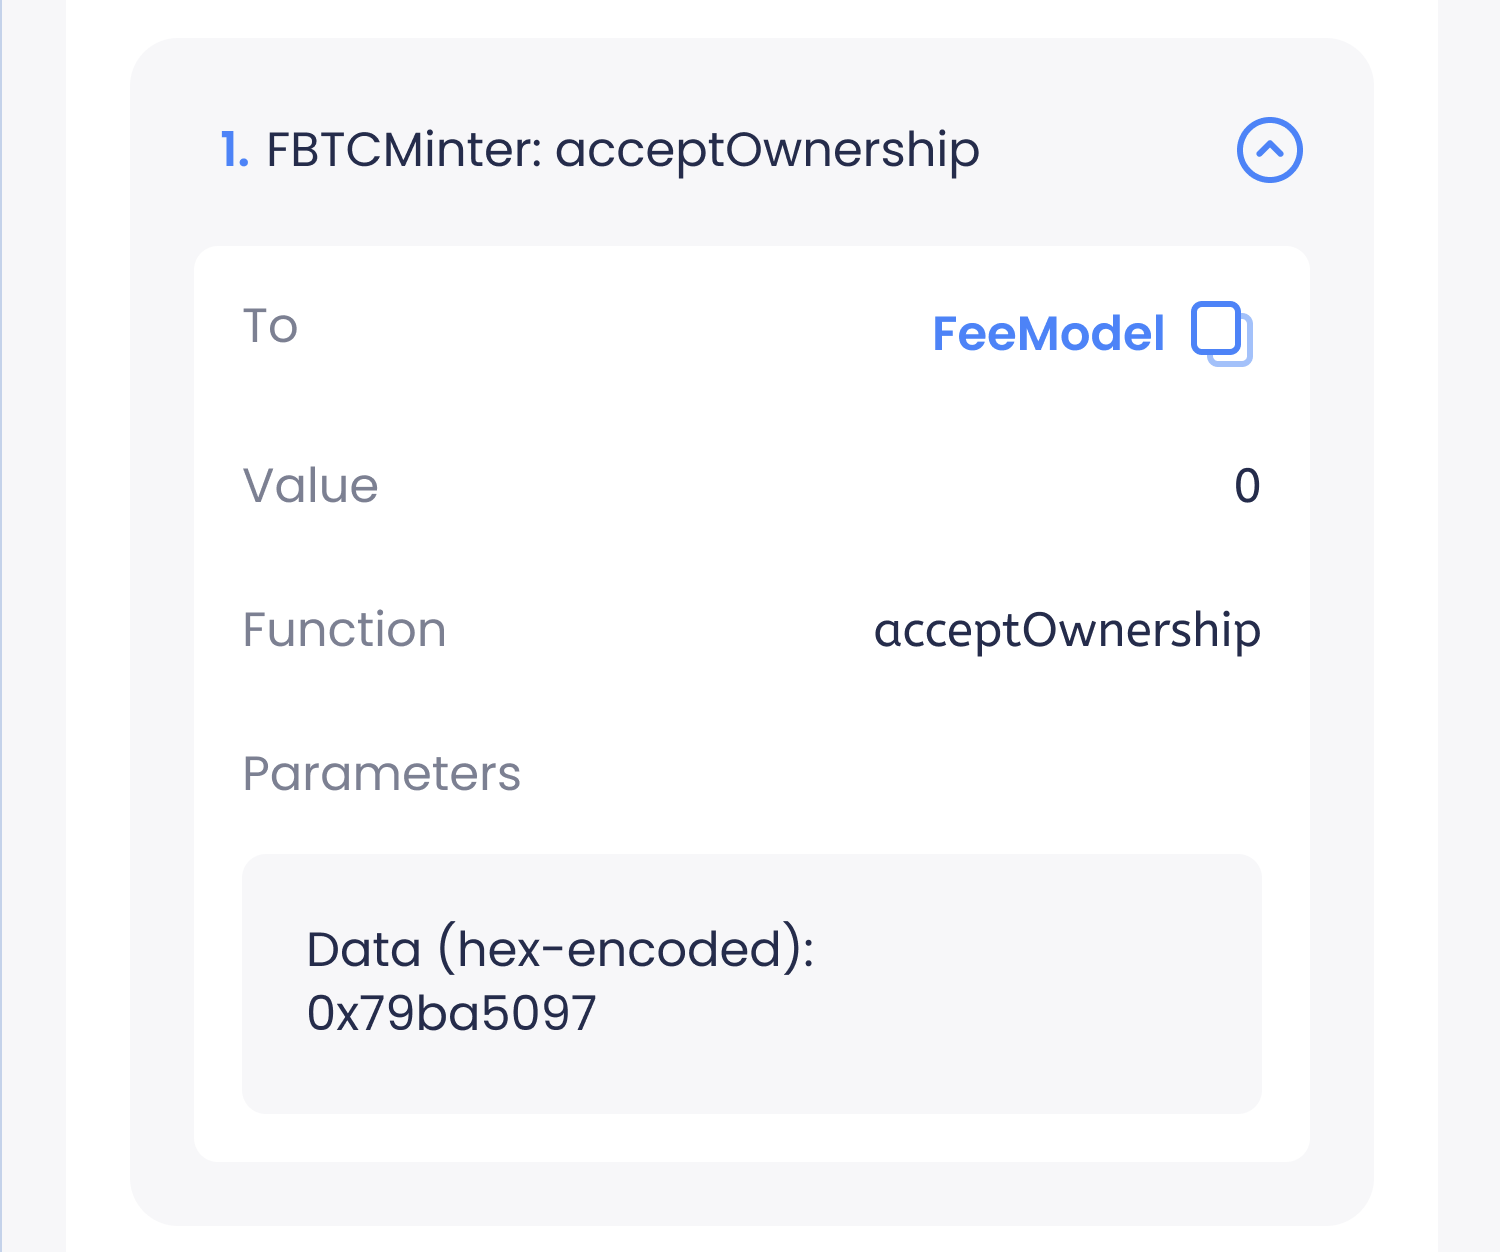
- Includes raw data that can be copied for verification
-
Marks high-risk factors with red labels that show risk details, for example:
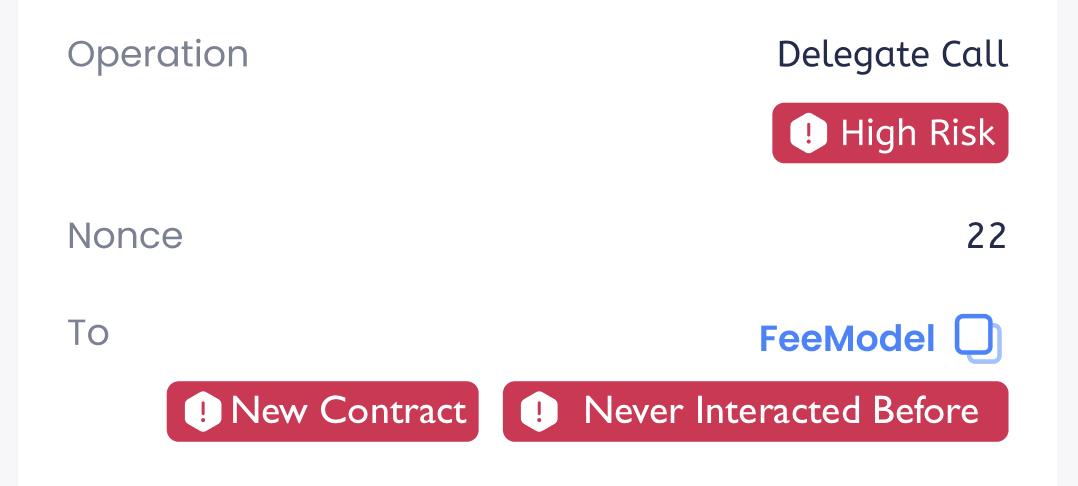
- For the To field:
- For the Operation field:
- Shows High Risk for operations such as Delegate Calls
- For the To field:
Step 7: (For MPC Wallets only) Key share holders sign the transaction
If you use MPC Wallet addresses as Safe{Wallet} Signers, the key share holders of the MPC Wallet need to sign the transaction:- Mobile signers review and sign on their Portal Mobile
- Server signers (server nodes that utilize the TSS Node package) automatically sign the transaction
Step 8: Complete the Safe{Wallet} multi-signature process
Other Safe{Wallet} Signers complete their signatures through their respective interfaces. Once the required signature threshold is met, the transaction can be executed.Step 9: Manage Safe{Wallet} message signing policies and view Safe{Wallet} transaction history
See Manage message signing policies for the following operations:- Edit a message signing policy
- Delete a message signing policy
- View revision history
- View message signing history related to a policy
- View policy details