Cobo Portal offers two types of Custodial Wallets: Asset Wallets and Web3 Wallets. While this guide focuses on Asset Wallets, you can also use it as general guidance for setting up and managing Web3 Wallets.

Prerequisites
- Contact our sales team to acquire your account activation link.
- A mobile device (iOS or Android) to run Portal Mobile, a mobile app designed by Cobo for multi-factor authentication (MFA) and operation approval.
Set up accounts and organization
As the first admin of your organization, complete these initial steps to configure your account and organization:Create an account
Use the activation link from our sales team to create your Cobo Portal account.Set up Portal Mobile
- Log in to Cobo Portal.
- Registering for a free trial gives you immediate access to the Production environment — no need to switch to a development environment. You can run your trial and self-service upgrades all in production environment.
- For testing, Enterprise clients are encouraged to use the development environment.
- For production, use the production environment.
- Click your profile avatar in the top-right corner, select Account, and switch to the Security tab.
- In the Multi-Factor Authentication (MFA) section, find the Cobo Portal Mobile row and click Set Up on the right.
- Follow the on-screen instructions to install Portal Mobile on your mobile device and link your account with Portal Mobile. For detailed steps, see Set up Portal Mobile.
Configure governance policies and user roles
If you’re in the testing phase and want to quickly verify deposits and withdrawals first, you can skip this section for now and configure them later.
Set up governance policies and user roles
Set up governance policies and user roles
Configuring governance policies and user roles is essential for managing access control and security in your organization.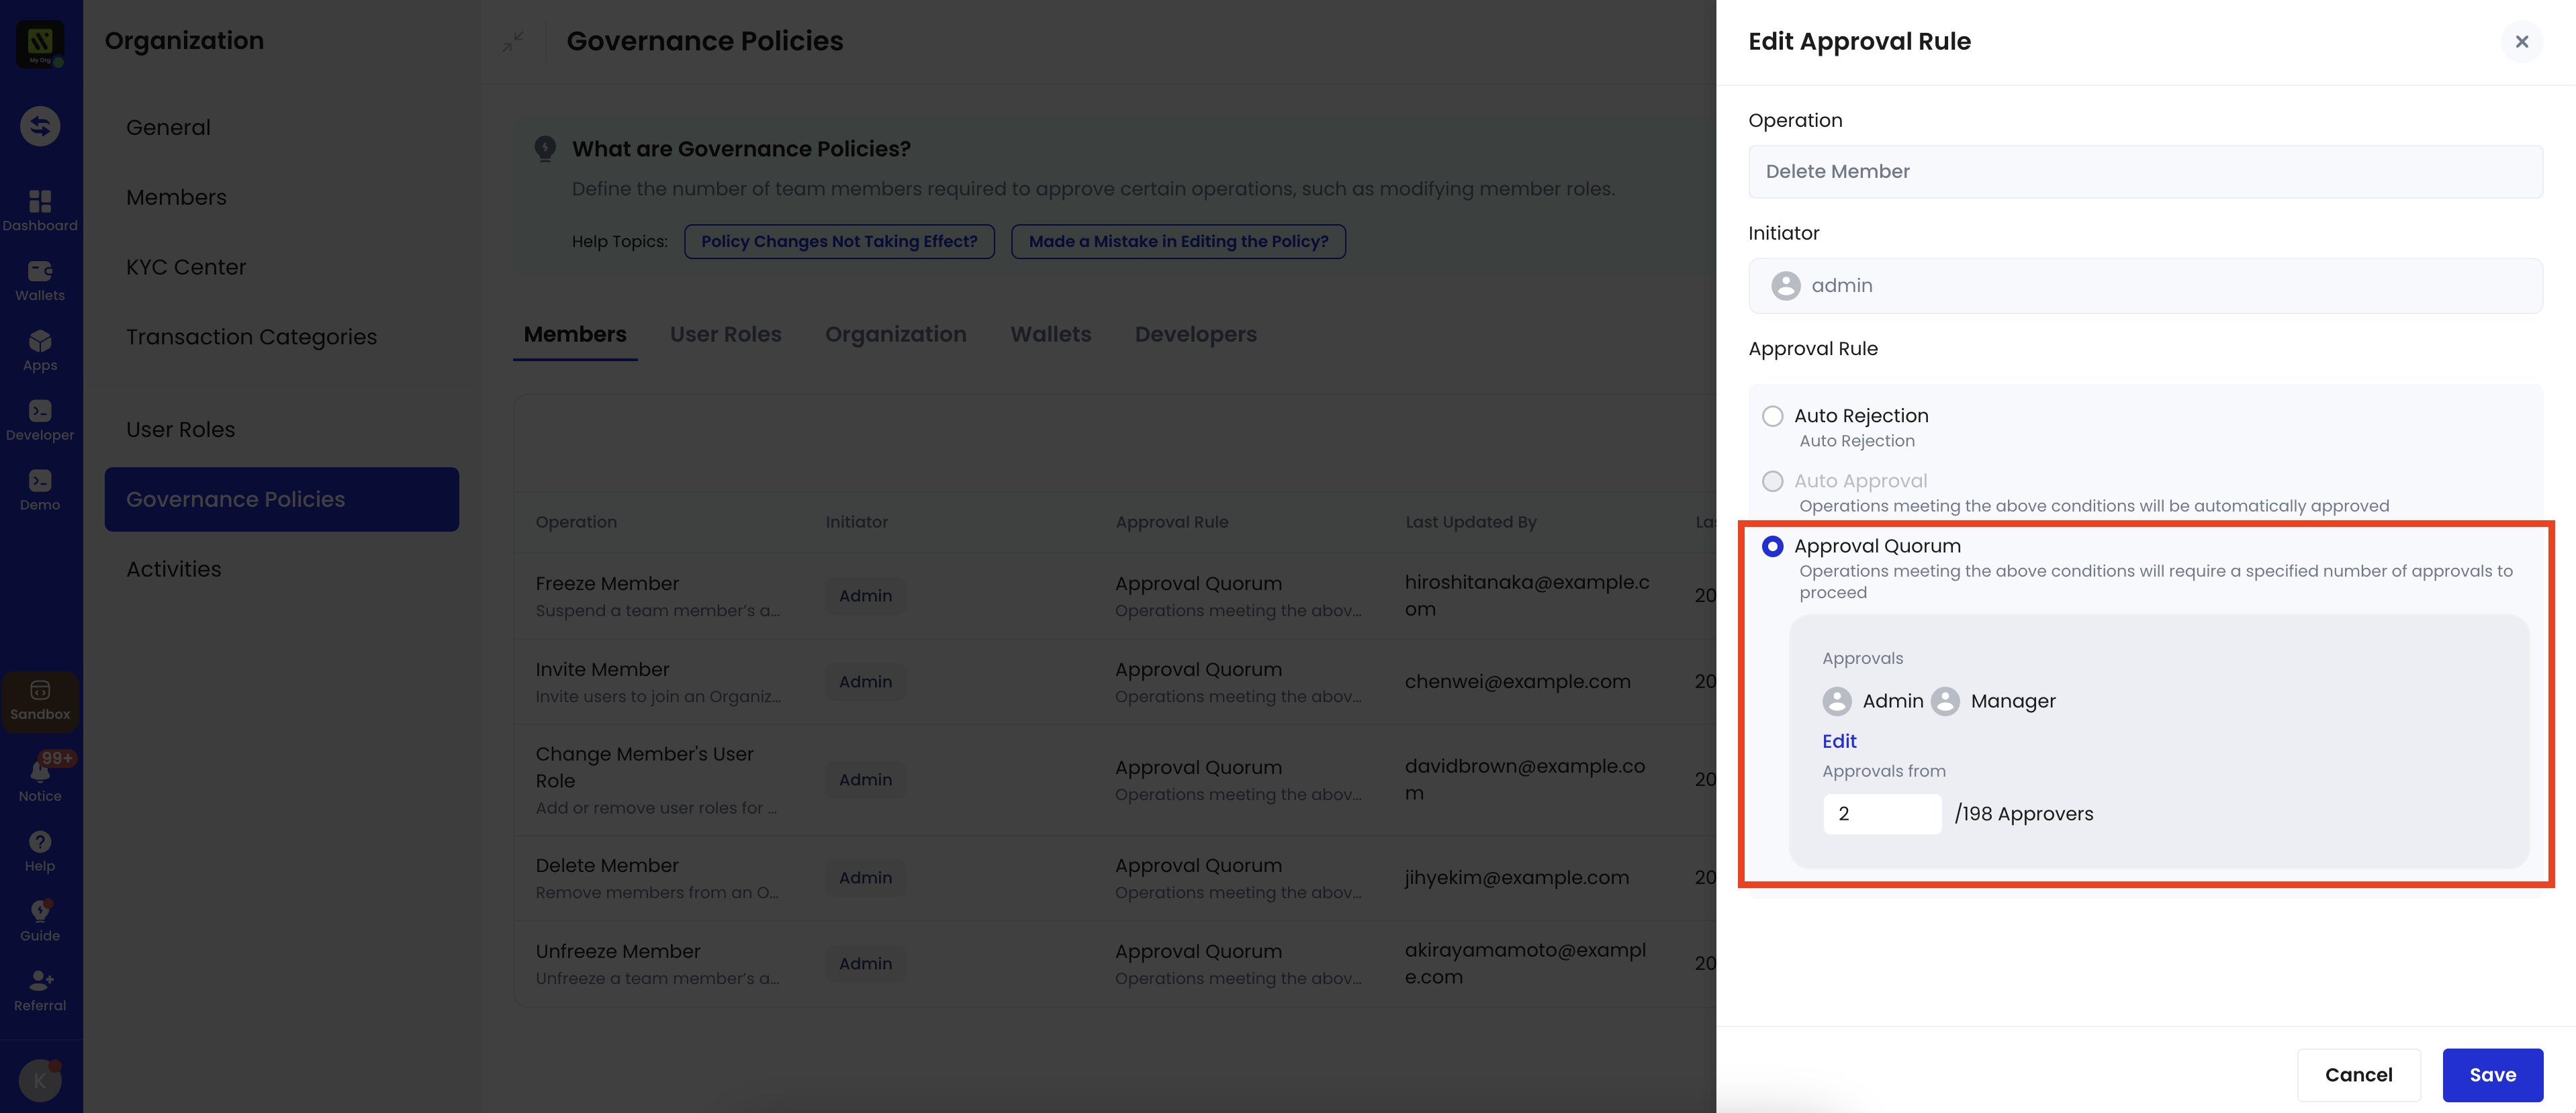
- Governance policies define approval rules for key operations (such as member deletion, organization freezing, and API key management), using mechanisms such as auto-approval, auto-rejection, and approval quorum. You can edit governance policies if the default ones don’t align with your organizational needs.
- User roles enable you to assign specific permissions to designated members within your organization. When you assign a role to a member, they can only perform actions allowed by that role. For instance, a member with the Viewer role can see wallet information but cannot withdraw tokens.
Invite members
- Log in to Cobo Portal.
- Registering for a free trial gives you immediate access to the Production environment — no need to switch to a development environment. You can run your trial and self-service upgrades all in production environment.
- For testing,, Enterprise clients are encouraged to use the development environment.
- For production, use the production environment.
- Click your profile avatar in the top-right corner, and then click Organization.
- Click Members. On the Members page, click Invite Members.
- Enter the member’s email address and name, and then select appropriate user roles.
Confirm on Portal Mobile that this invitation was initiated by you. Also, as a default governance policy, at least half of your organization admins must approve the invitation request on Portal Mobile.
Add chains
View and manage the chains available for your organization:- Log in to Cobo Portal.
- Registering for a free trial gives you immediate access to the Production environment — no need to switch to a development environment. You can run your trial and self-service upgrades all in production environment.
- For testing, Enterprise clients are encouraged to use the development environment.
- For production, use the production environment.
- Click your profile avatar in the top-right corner, and then click Pricing Plans.
- Navigate to Supported Chains and click the Chain Management icon.
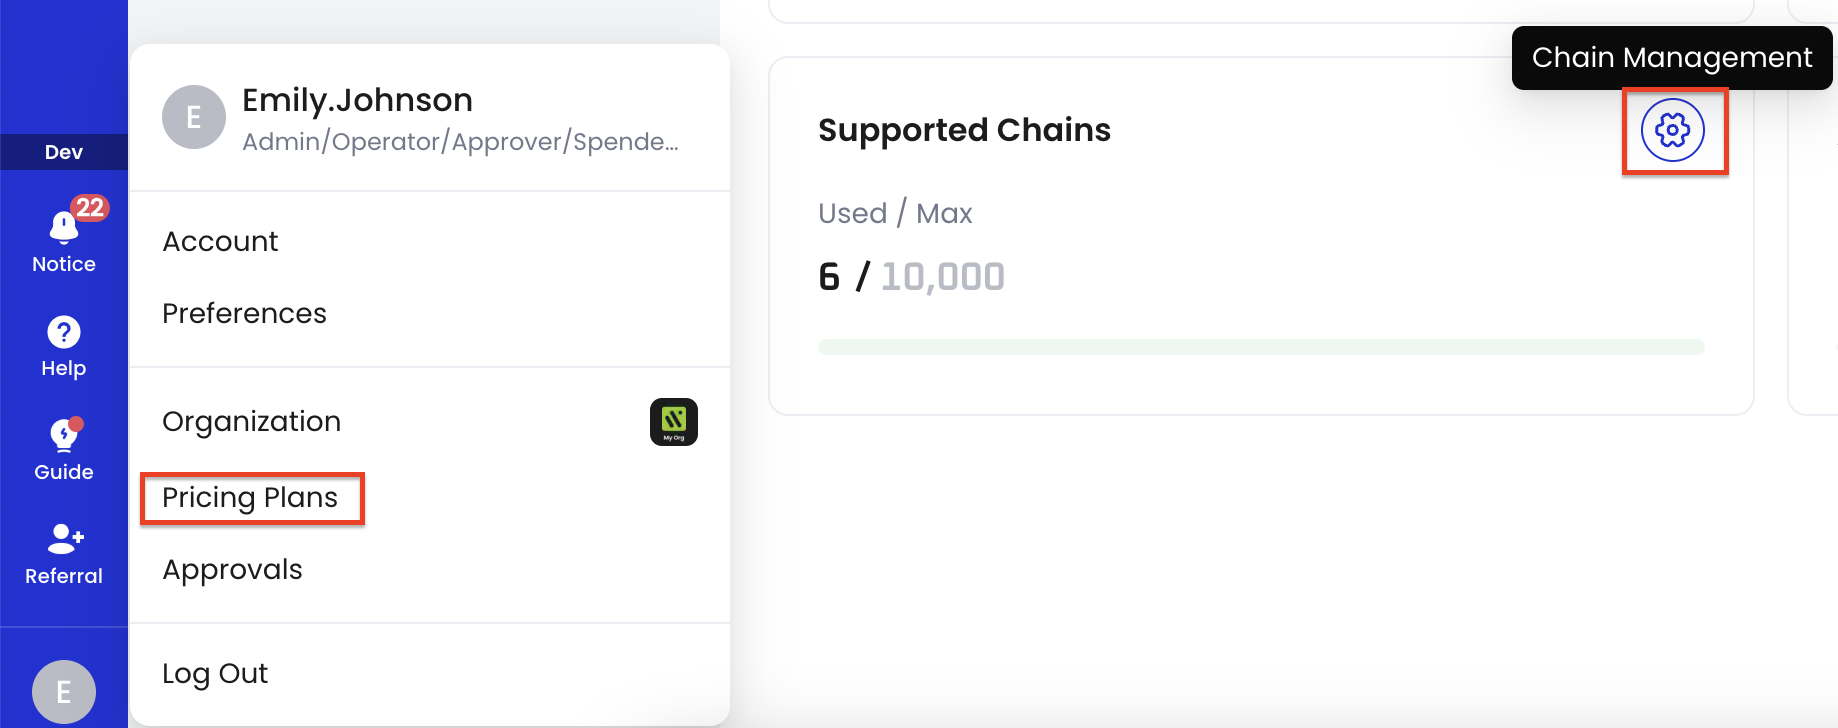
- On the Chain Management page, review the list of available chains. If the chains you need are not present, click Add Chains to include additional chains for your organization’s use.
After adding a chain, all its supported tokens will be available for deposit and withdrawal in your wallets.
To view a full list of tokens and chains supported by Cobo, see Supported tokens and chains.
Make a deposit
- Log in to Cobo Portal.
- For testing, use the development environment.
- For production, use the production environment.
- Click Wallets in the left sidebar, then select Custodial Wallets.
- A default wallet is automatically created for you, with addresses pre-generated for 9 chains that are enabled by default (Ethereum, TRON, BNB Smart Chain, Bitcoin, Solana, Polygon, Arbitrum, Avalanche C-Chain, Base). All EVM chains share the same
0xaddress, so there is no need to add them again. You can also create a new wallet if needed. - Click the wallet you want to deposit into.
- Locate the token you want to deposit into the wallet, and then click
 .
.
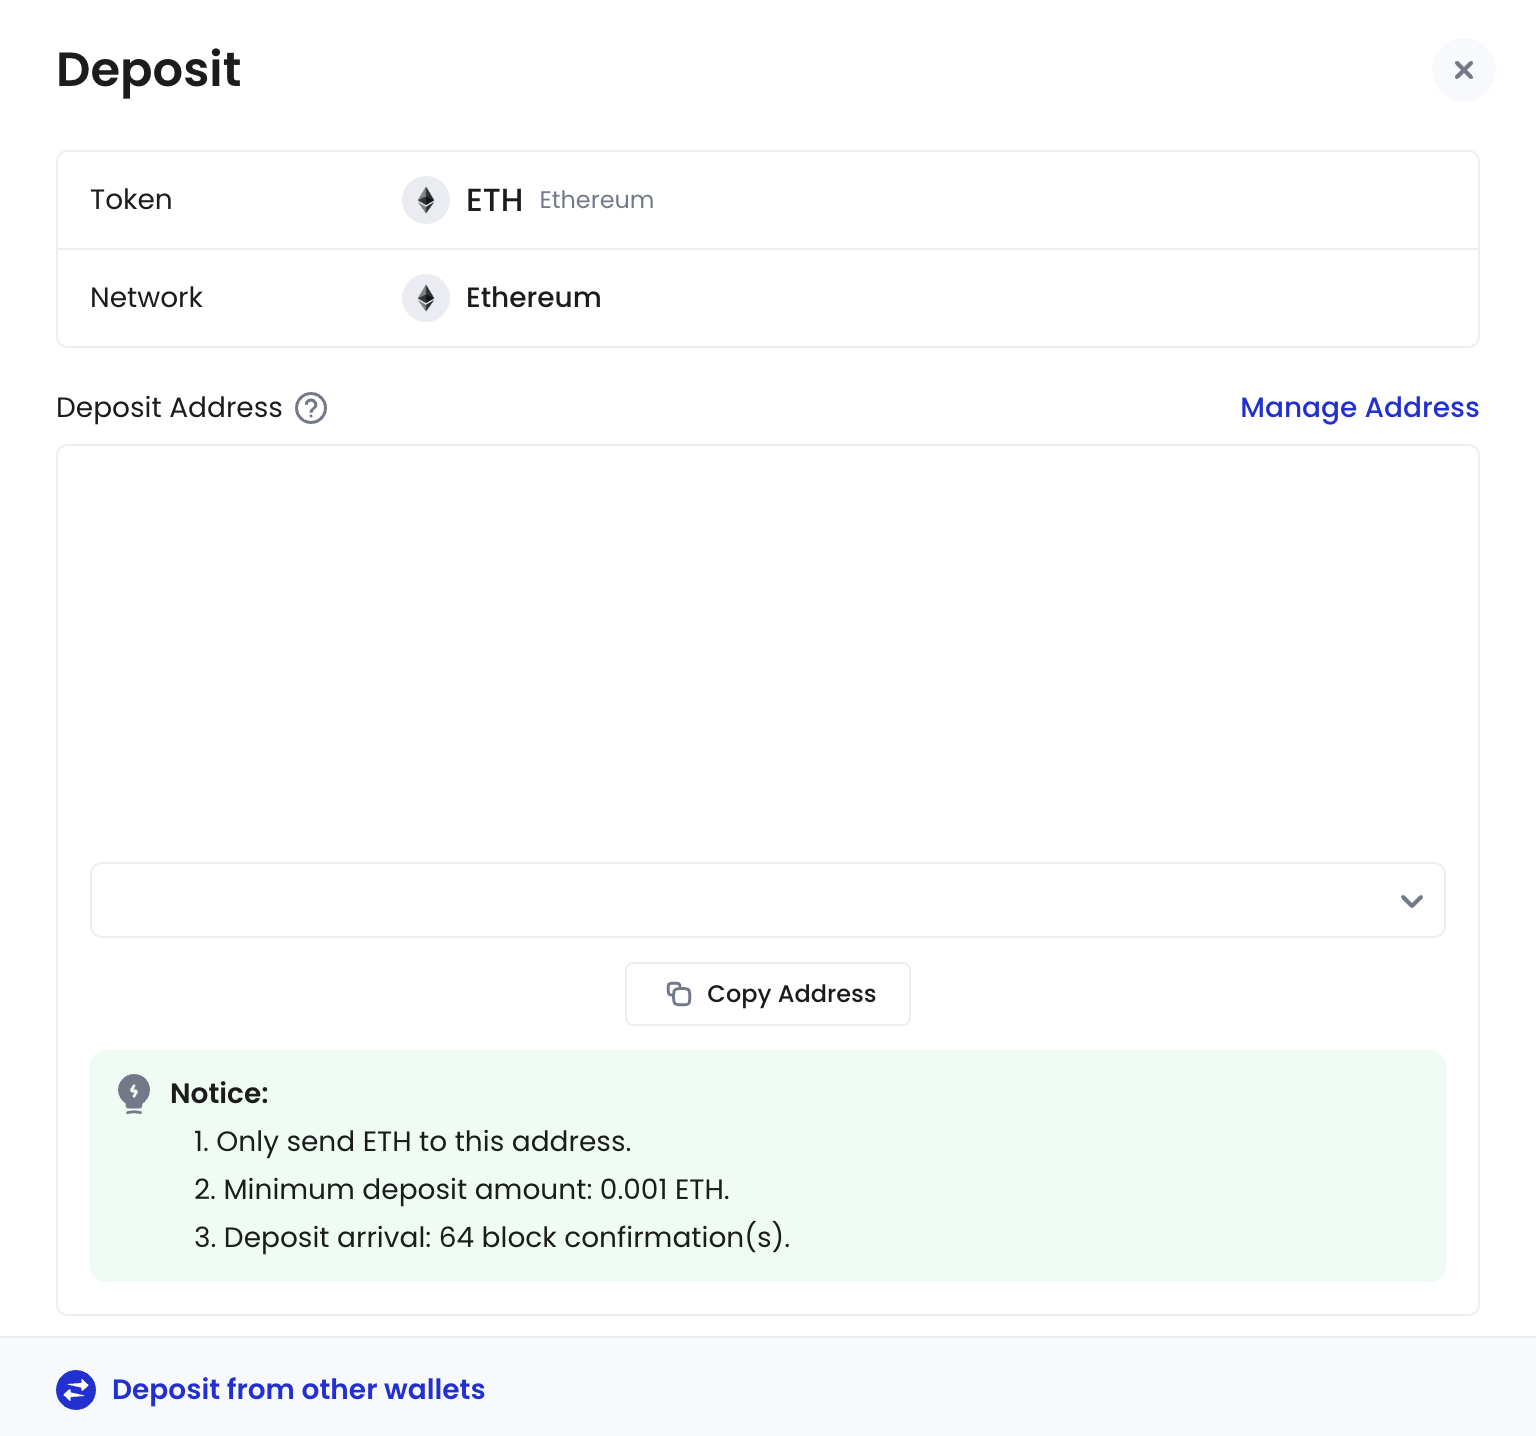
- Click Copy Address to copy the deposit address.
- Proceed to your preferred external wallet to initiate the transfer to the deposit address you have copied.
Configure transaction policies
If you’re in the testing phase and want to quickly verify deposits and withdrawals first, you can skip this section for now and set them up later.
Configure transaction policies
Configure transaction policies
Transaction policies are essential measures to secure your digital asset operations. When a transaction starts, it’s checked against your organization’s transaction policies in sequential order. If it matches a policy’s trigger condition, the specified action will be taken: auto-approve, auto-reject, or an approval quorum process.In this guide, we’ll create a policy that requires 2-of-3 Admin approval for large USDT withdrawals to non-trusted addresses. For other policy setups and advanced configurations, see Set up token transfer policy.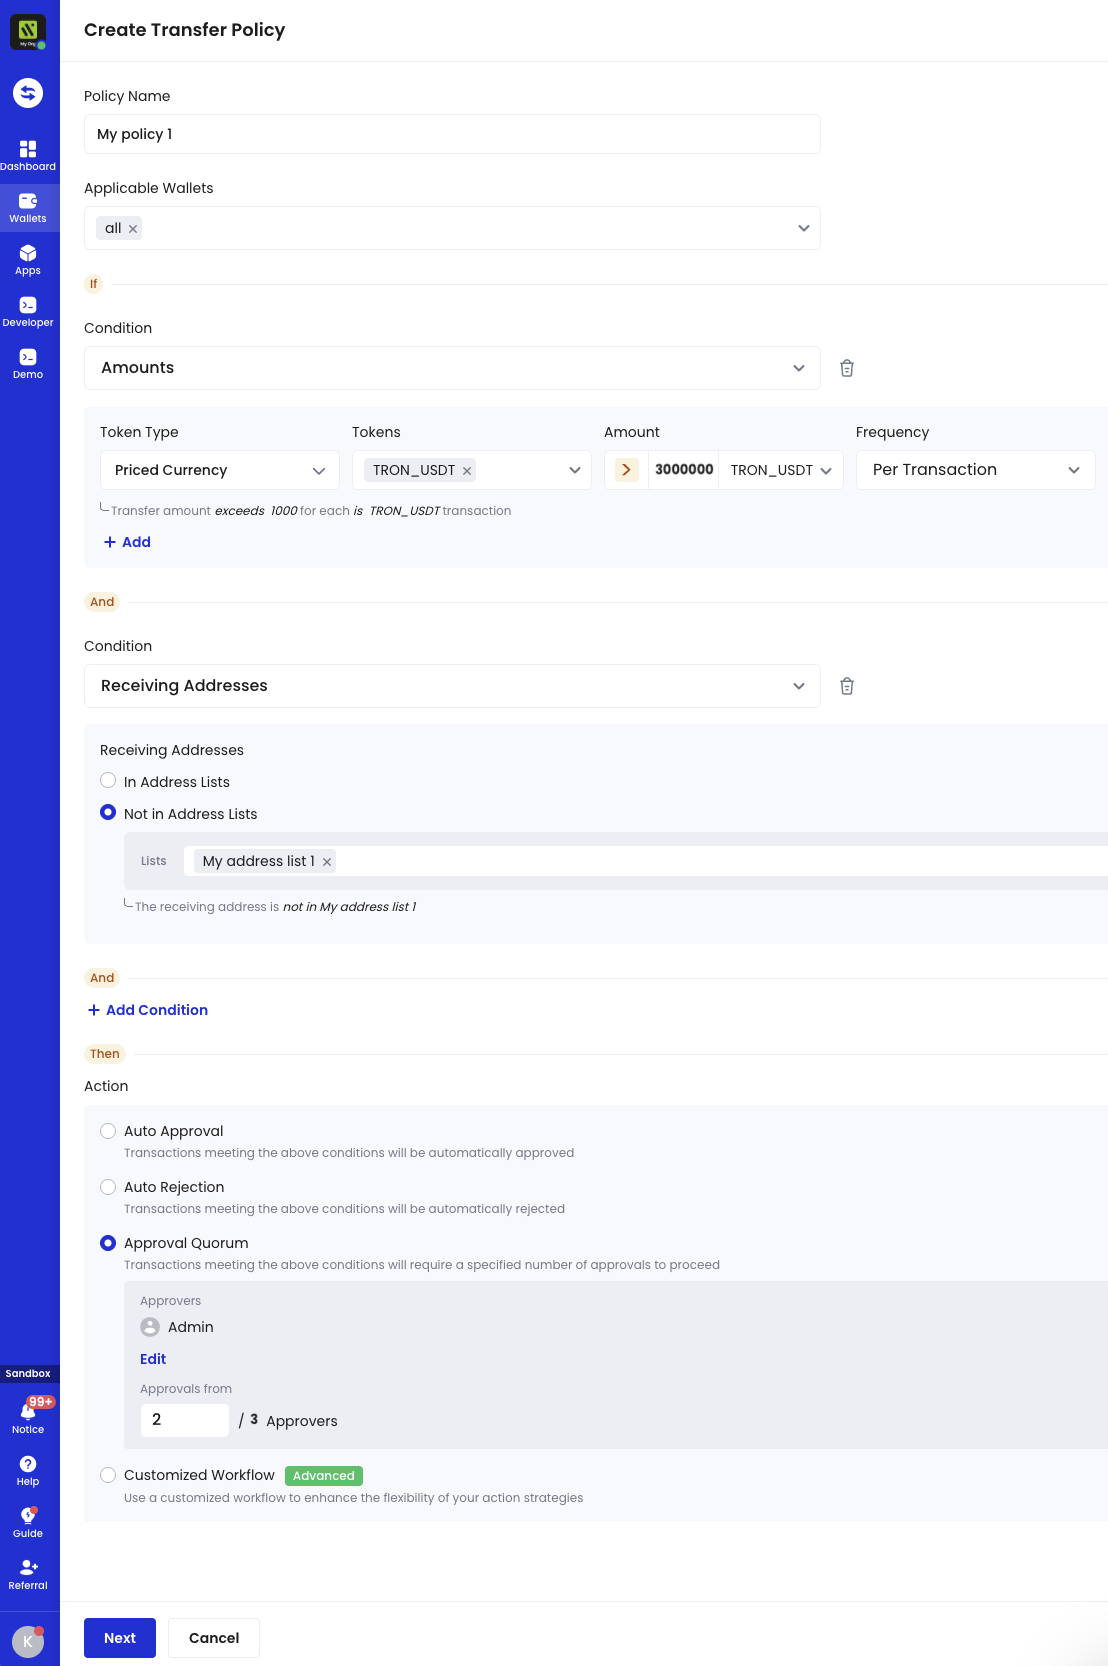
Prerequisites
- You have invited enough members to have at least 3 members in the organization and have assigned the Admin user role to at least 3 of them.
Configure a trusted receiving address list
First, create a list of trusted addresses that are pre-approved for withdrawals:In our case, we will configure the system so that any large USDT withdrawals to addresses outside this trusted receiving address list will require multi-signature approval (2 out of 3 Admin signers).
-
Log in to Cobo Portal.
- For testing, use the development environment.
- For production, use the production environment.
- Click Transaction Policies in the left sidebar.
- Navigate to the Address Lists tab and click Create List.
- Enter a name for your address list, then click Confirm.
- Click your newly created address list, click Add Address, then enter your trusted addresses.
- Click Submit and verify with your Google Authenticator code.
Create the transaction policy
Now, let’s set up a policy with these security rules:- Trigger: Withdrawals over 30,000,000 USDT to non-trusted addresses
- Action: Require approval from 2 out of 3 approvers with the Admin user role.
- In Cobo Portal, go to Transaction Policies in the left sidebar.
- Click Create Policy > Token Transfer.
- Configure the settings as shown in the screenshot:
- Click Next and follow the on-screen instructions to complete the policy setup.
Make a withdrawal
-
Log in to Cobo Portal.
- For testing, use the development environment.
- For production, use the production environment.
- Click Wallets in the left sidebar, then select Custodial Wallets.
- Click the wallet from which you want to withdraw tokens.
-
Locate the token you want to withdraw, then click
 to open the Transfer dialog.
- Fill in the required information, then click Submit.
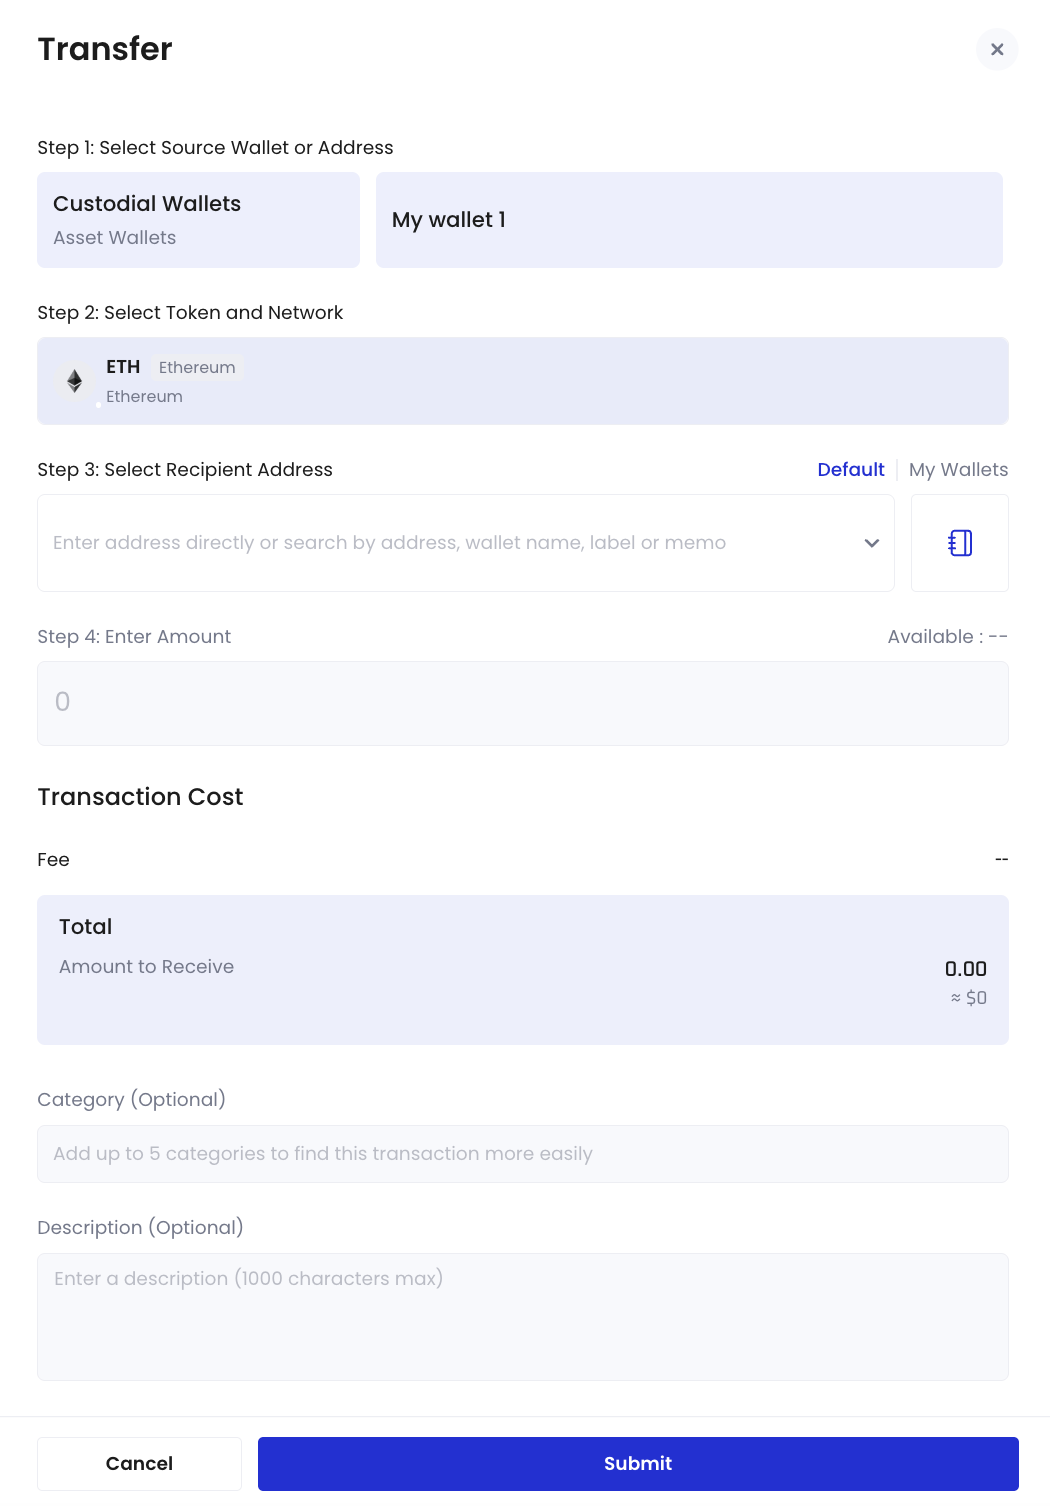
- Double confirm the withdrawal on Portal Mobile.
To learn more about making transfers from Asset Wallets, see Transfer from Custodial Wallets (Asset Wallets).
View transaction details and status
After making a transfer to or from your Asset Wallets, you can view its transaction status in Transaction History in the left sidebar.