Prerequisite
- It’s recommended that you set up a token transfer policy.
- You have deposited funds into the Web3 Wallets.
- You have enough native token in your wallet to pay for the gas fee (on-chain transaction fee), or you have enabled Fee Station to pay for the gas fee.
Steps
- Log in to Cobo Portal.
-
To open the Transfer dialog, click Transfer in the left sidebar. Alternatively, click
 on your Web3 Wallet page, the corresponding token or address will be preselected for you.
- Select Custodial Wallets > Web3 Wallets as the source wallet. For the wallet address, select from the drop-down menu or search by wallet name, address, or label. Web3 Wallets created via both Cobo Portal and WaaS 2.0 API will be listed.
- Select the token type and network for the transfer. To enable a new token type, navigate to your Web3 Wallet page and click Add Tokens.
-
Select a recipient address from your Address Book or your wallets on Cobo Portal, or manually enter an address.
- Address Book
 : Only addresses associated with the blockchain network of the selected token will be listed.
 - My Wallets: Select a wallet type and then click on the specific wallet you would like to transfer to.
- Address Book
- Enter the transfer amount.
-
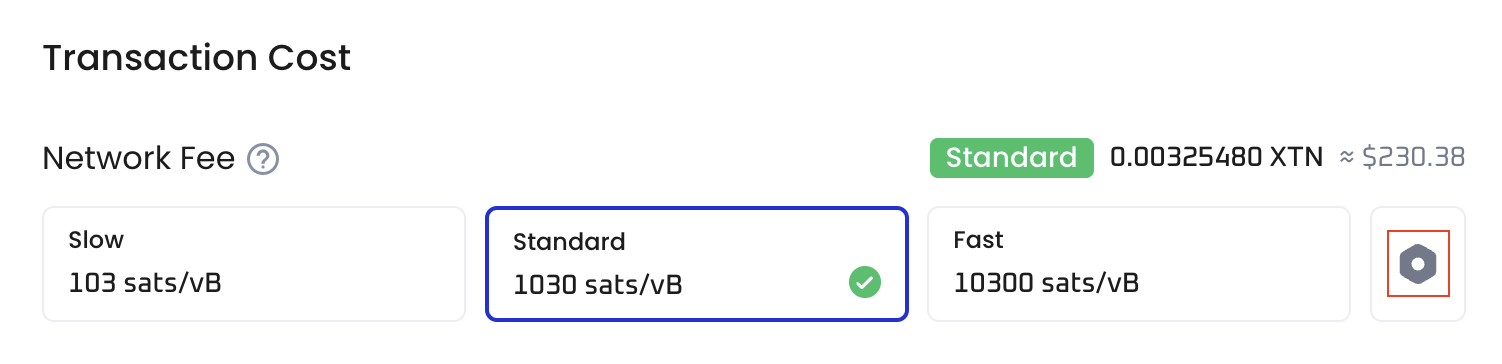
When you initiate a transfer, transaction fees (on-chain network fees) are charged to pay for the cost of executing the transaction on the blockchain.
- Fee source: By default, the fee is deducted from the source wallet you use for the withdrawal. If you have configured Fee Station to pay transaction fees, the fee will be deducted from Fee Station.
- Fee models: Different chains adopt different fee models. For example, Ethereum supports both EIP-1559 and Legacy. To learn how fees are calculated on each chain, see Transaction fee models.
-
Fee formula and parameters: Hover over the question mark icon next to Network Fee
 to view the fee formula for that chain.
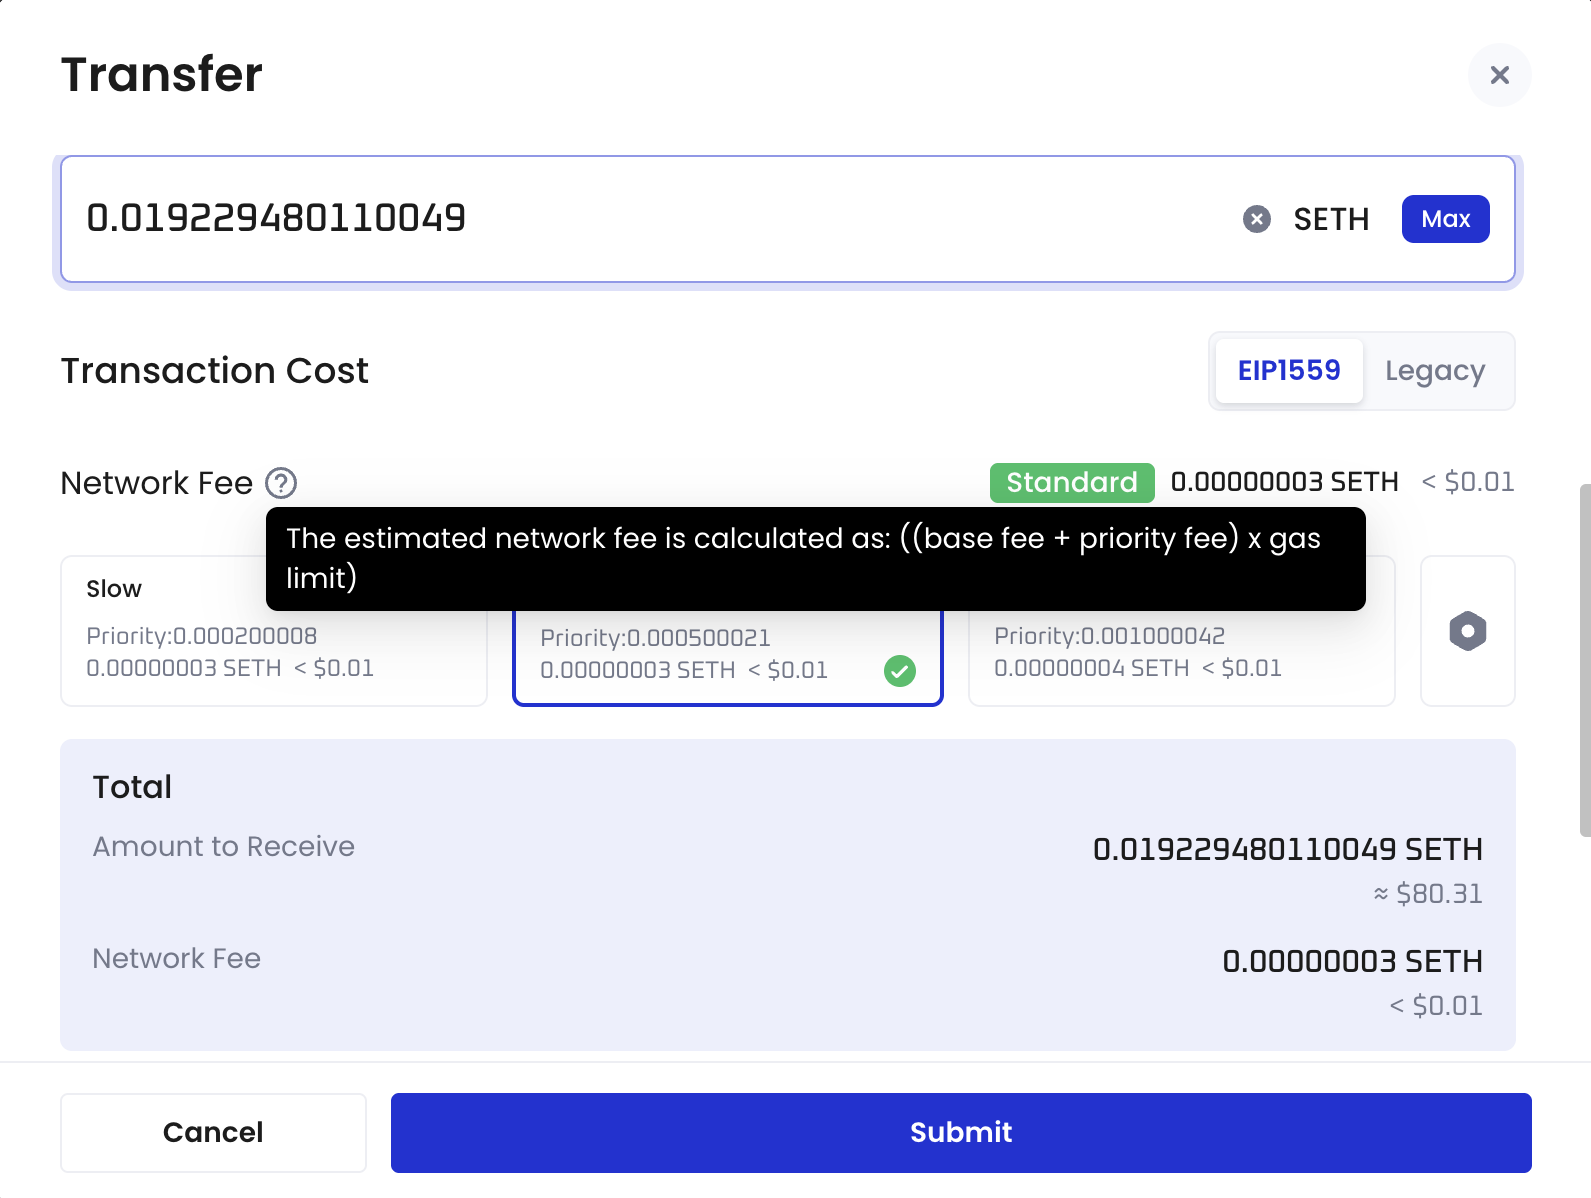
- Transfer speed: You can choose different speeds (slow, recommended, fast). The system automatically maps a corresponding fee tier.
-
Custom settings: Click the settings button (gear icon) to adjust configurable fee parameters and ensure the actual fee does not exceed your cap.
After the transaction is completed, you can check the actual fee in the Network Fee field of the transaction details. -
(Optional) Add a transaction category and description to identify this transfer more easily.
- For Category, either create a new category or select from existing ones. Each transfer can be associated with a maximum of 5 categories. Note that once a category is added, it cannot be edited or deleted. Currently, Cobo Portal allows the creation of up to 200 categories.
- To view the categories under your organization, click your profile avatar in the top-right corner, then select Organization > Transaction Categories.
- For Description, add a description with a maximum limit of 100 characters.
- For Category, either create a new category or select from existing ones. Each transfer can be associated with a maximum of 5 categories. Note that once a category is added, it cannot be edited or deleted. Currently, Cobo Portal allows the creation of up to 200 categories.
- Click Submit.
- Approve the request on your Portal Mobile. If it is a new address not found in your Address Book or any of your wallets created on Cobo Portal, you will be prompted to add the address to your Address Book.