Due to the Bybit security incident, Safe Wallet has suspended third-party delegate call services. As a result, Cobo’s Smart Contract Wallets and related services (including on-chain transaction policies) are temporarily unavailable. However, existing wallets and on-chain transaction policies can still be used. Recovery timeline will be announced later.
Prerequisite: Please make sure that you have already created a Delegate Key and added assets to the selected wallet.
- Log into Cobo Portal.
- Click Wallets in the left sidebar, then select Smart Contract Wallets.
- Click on the Safe{Wallet} you have connected to or created on the Cobo Portal.
- Switch to the On-Chain Transaction Policies tab and click
 .
. - Enter a name for your on-chain transaction policy, with a maximum of 50 characters.
- Select the Delegates to which this policy will apply. Note that each Delegate is an EOA address. Upon successful creation of an on-chain transaction policy, your selected Delegates will also be authorized to perform single-signature operations such as token transfers and custom contract calls.
- My Wallets: Select addresses from your MPC Wallets (Organization-Controlled) and designate them as your Delegates.
- Other Addresses: Manually enter EOA addresses to designate them as your Delegates.

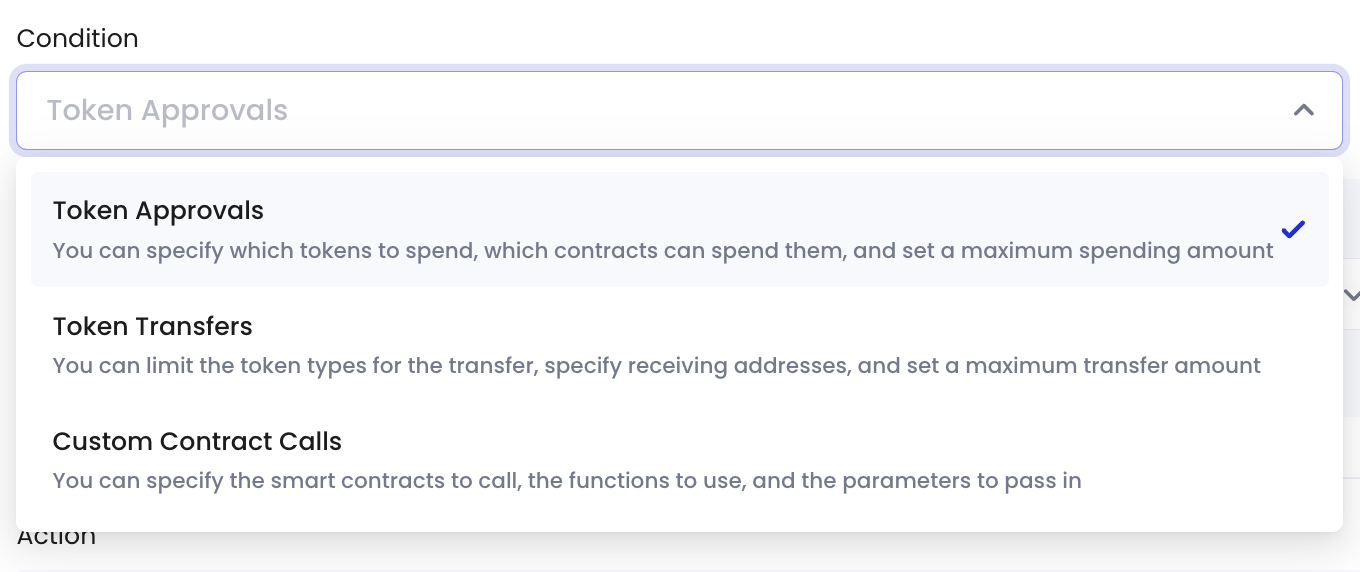
- Click + Add Condition to select an If condition.
- Token approvals: You can specify which tokens can be spent, the spenders authorized to spend them, the maximum spending amount per transaction or per specified time period.
- Token transfers: You can specify which types of tokens can be transferred, the receiving addresses, the maximum transfer amount per transaction or per specified time period.
- Custom contract calls: You can specify the smart contract to call, the functions to use, and the parameters to include in each transaction.
- (For token approvals only) Please fill in the following fields:
- Tokens: In the drop-down menu, click Include to select the list of tokens approved for spending.
- Amount: In the drop-down menu, select Any Amount if there is no upper limit on the number of tokens approved for spending. Select Count by Number to specify the exact number of tokens approved for spending.
- Frequency: In the drop-down menu, select No Frequency Limit if the maximum spending amount applies to the total number of transactions from the approved spenders. Select Per Transaction if the maximum spending amount applies to each transaction, or select By Hour to specify the number of hours for which the maximum spending amount applies.
- Approved Spenders: In the drop-down menu, select Any Address to allow any address to spend the approved tokens. Select In Address Lists to restrict spending to an address added to your Address Lists.
- Please note that if you need to edit the approved spender associated with a submitted on-chain transaction policy, you must first navigate to Transaction Policies > Address Lists to update the address. Then, head to Smart Contract Wallets > On-Chain Transaction Policies > Current to modify the associated on-chain policy and resubmit it for multi-sig confirmation.

- (For token transfers only) Please fill in the following fields:
- Tokens: In the drop-down menu, click Include to select the list of tokens approved for spending.
- Transfer Amount: In the drop-down menu, select Any Amount if there is no upper limit on the transfer amount. Select Count by Number to specify the maximum transfer amount.
- Frequency: In the drop-down menu, select No Frequency Limit if the maximum transfer amount applies to the total number of transactions. Select Per Transaction if the maximum transfer amount applies to each transaction, or select By Hour to specify the number of hours for which the maximum transfer amount applies.
- Receiving Addresses: In the drop-down menu, select Any Address to allow the tokens to be transferred to any address. Select In Address Lists to restrict spending to an address added to your Address Lists.
- Please note that if you need to edit the receiving address associated with a submitted on-chain transaction policy, you must first navigate to Transaction Policies > Address Lists to update the address. Then, head to Smart Contract Wallets > On-Chain Transaction Policies > Current to modify the associated on-chain policy and resubmit it for multi-sig confirmation.

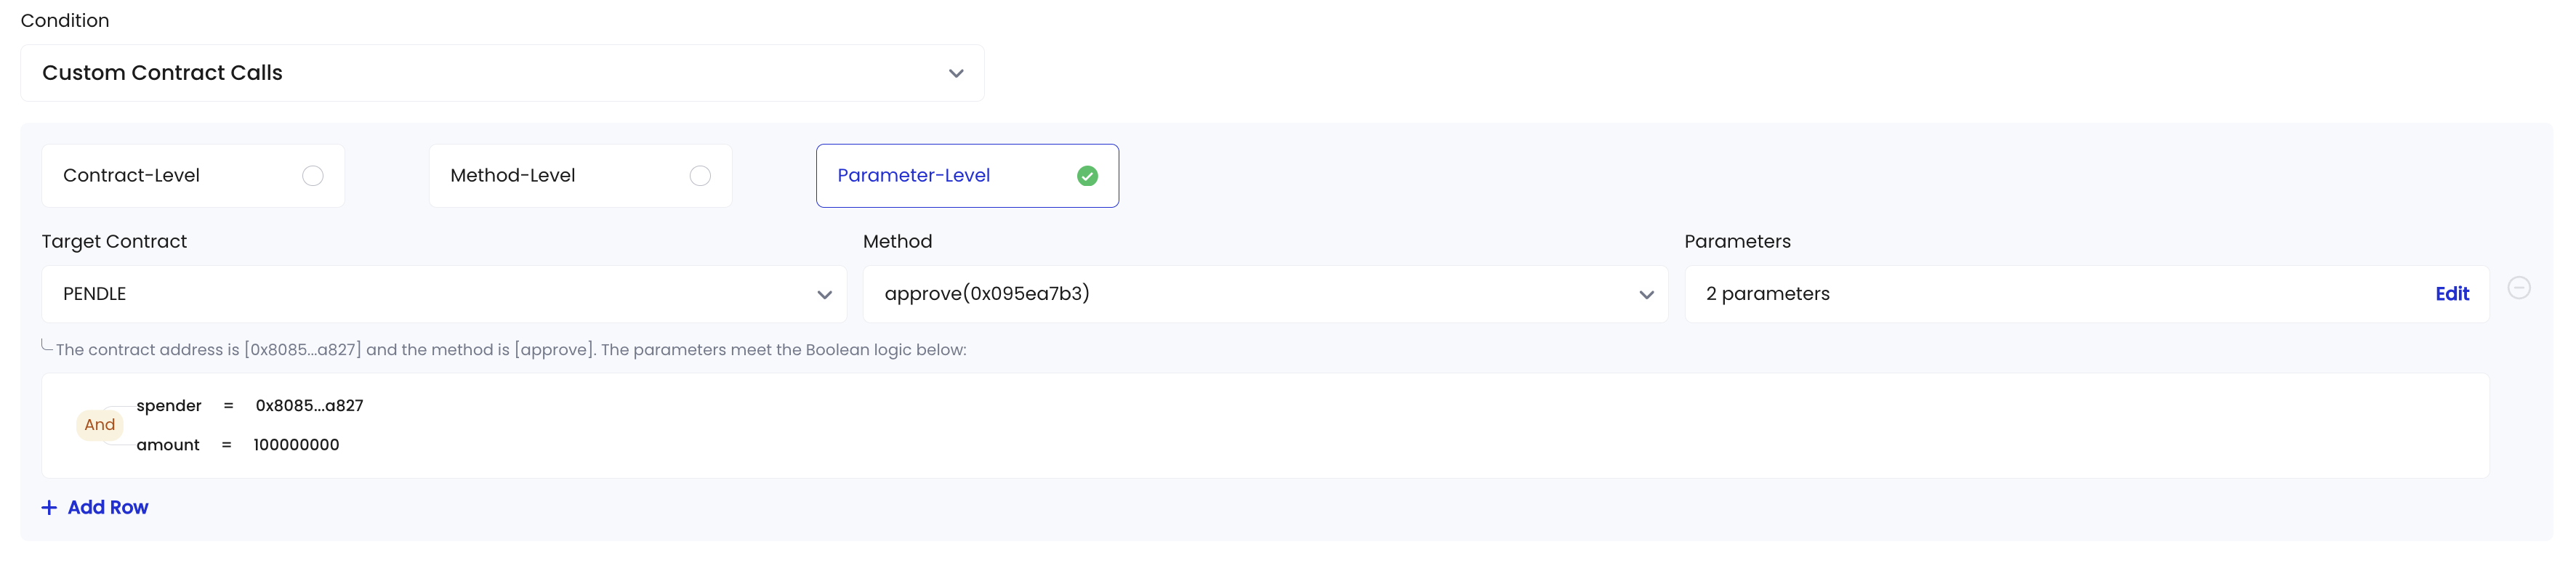
- (For custom contract calls only) Select whether the smart contract call will be made at the contract level, method level, or parameter level. Then, fill in the corresponding fields:
- Contract-Level:
- If you have added target contracts before, search for them in the drop-down menu. Otherwise, key in the contract address in the text box within the drop-down menu and click Add Address.
- Method-Level:
- If you have added target contracts before, search for them in the drop-down menu. Otherwise, key in the contract address in the text box within the drop-down menu and click Add Address.
- Select the methods you need. If the displayed methods are incorrect, click Edit Contract ABI. In the pop-up window, either edit the text manually or upload a JSON file from your device.
- Parameter-Level:
- If you have added target contracts before, search for them in the drop-down menu. Otherwise, key in the contract address in the text box within the drop-down menu and click Add Address.
- Select a method from the drop-down menu. If the displayed methods are incorrect, click Edit Contract ABI. In the pop-up window, either edit the text manually or upload a JSON file from your device.
- Click Create to add parameters. In the pop-up window, specify the parameter, operator, and value based on your contract call requirements. Click + Add Group if you want to add a set of parameters.
- Review the Then condition and click Next. Note that setting up an on-chain transaction policy for Smart Contract Wallets is similar to granting on-chain permissions. As a result, any on-chain transaction triggered under this policy will be automatically approved.
- If you want to make edits to the policy, click Cancel.
- A multi-sig confirmation from Safe{Wallet} signers is required. Click Submit to initiate the multi-sig transaction. Alternatively, click Add to Queue and later navigate to Smart Contract Wallets > On-Chain Transaction Policies > Queue to batch-submit all multi-sig confirmation requests in the queue.