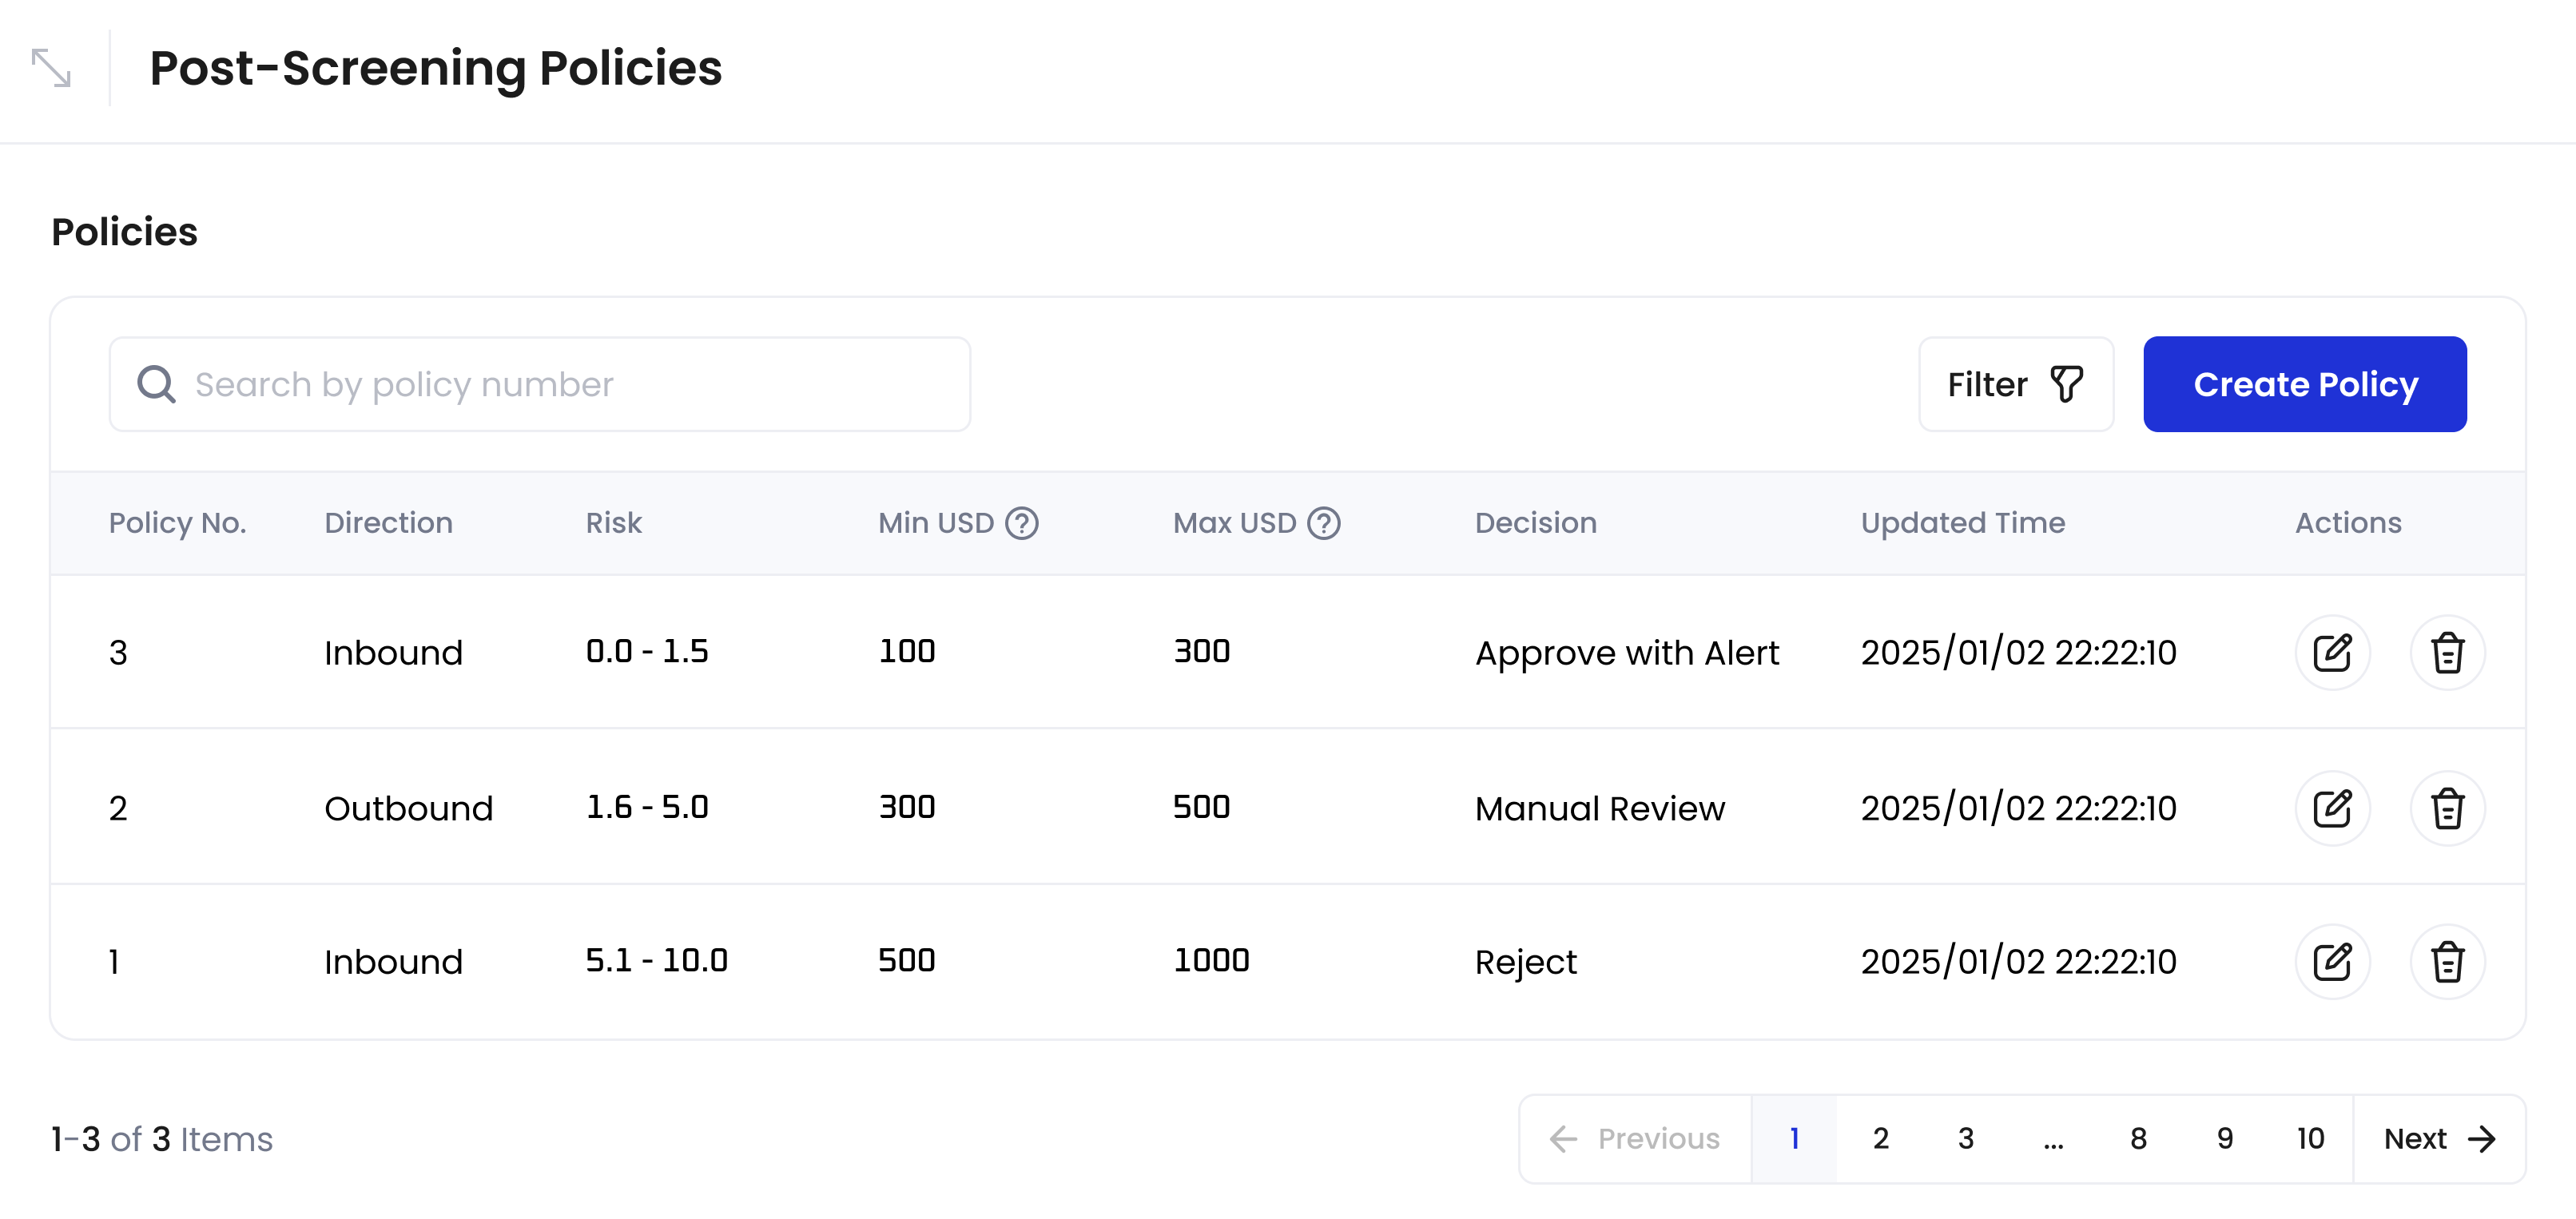
Post-Screening Policies interface
To access this feature:
- Log in to Cobo Portal
- Click Apps in the left sidebar to open Cobo Portal Apps
- Find and open Screening
- Click Post-Screening Policies
- CipherOwl
- Elliptic
Post-Screening Policies when using CipherOwl as the AML provider: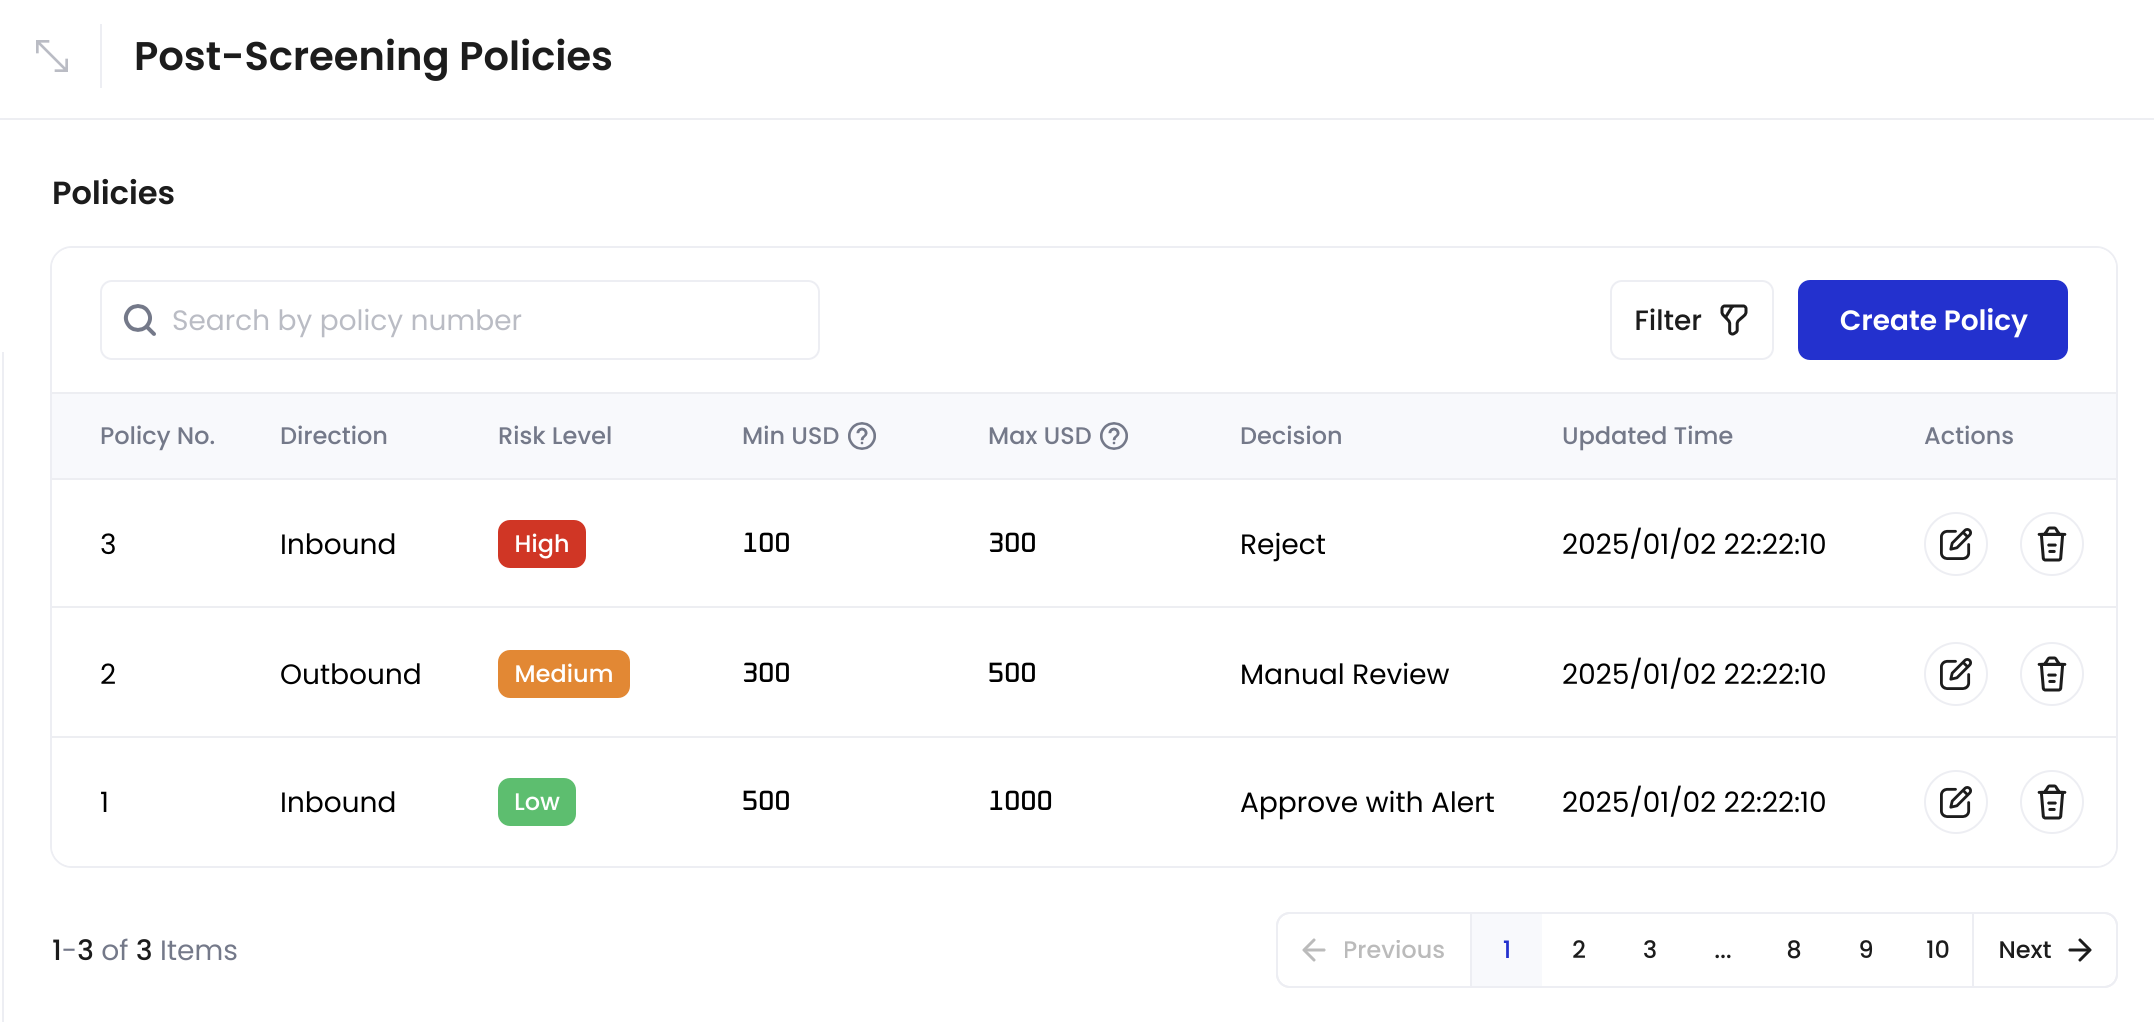

Policy actions
Create, edit, and delete policies
Select and configure your preferred AML provider in Settings first.
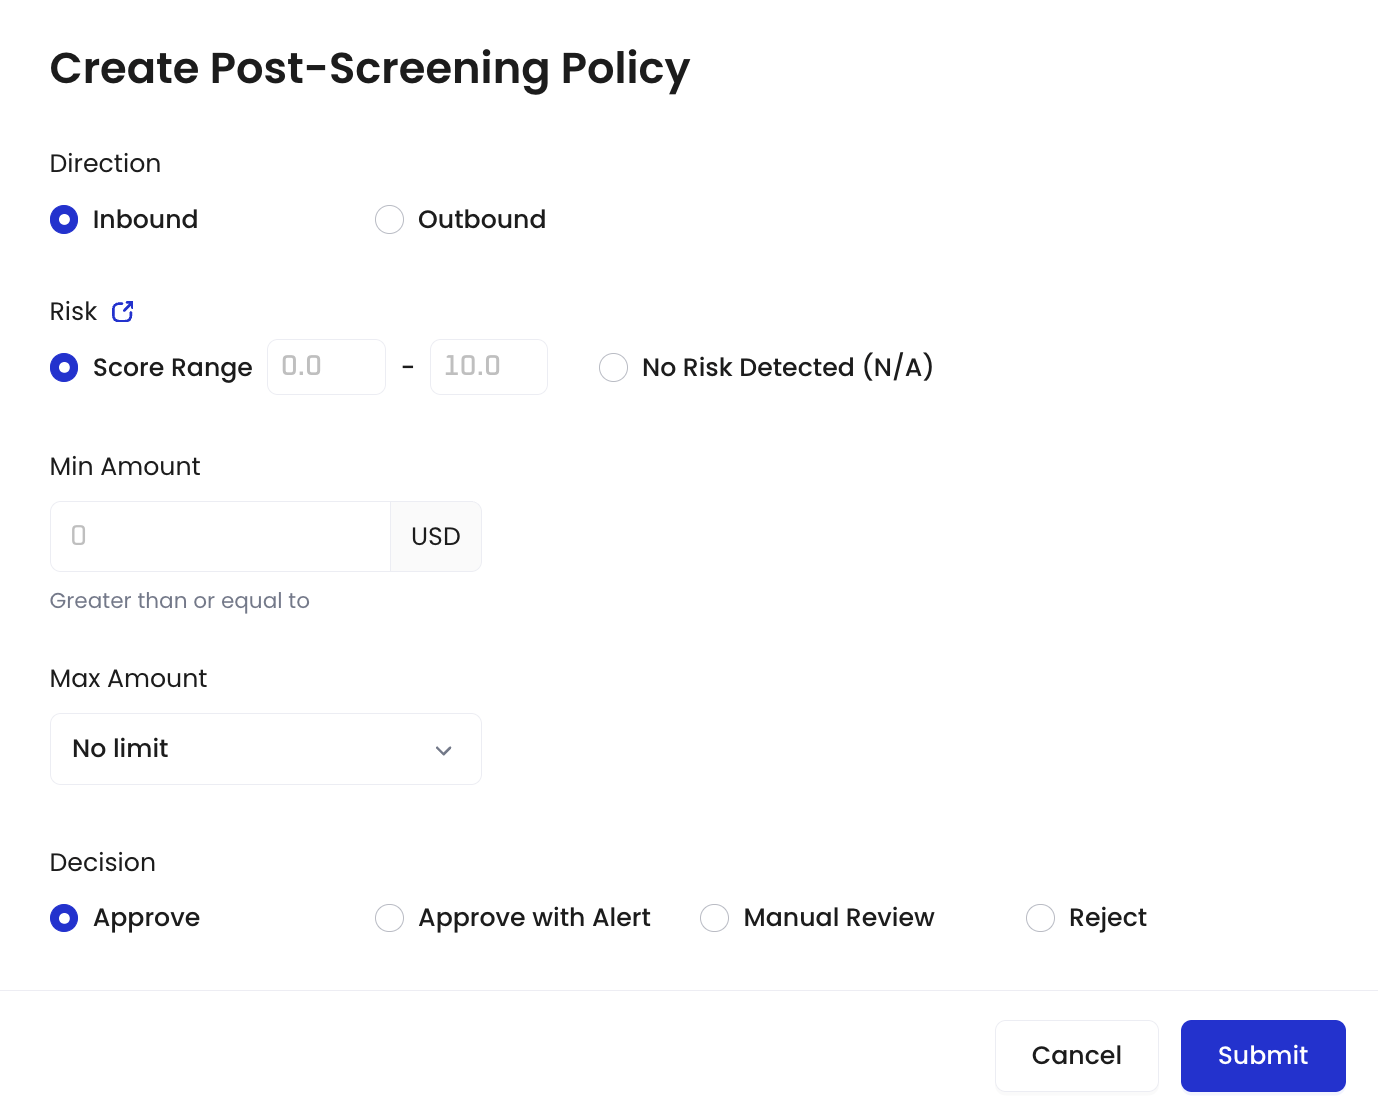
Create policies
- Go to the Post-Screening Policies interface.
- Click Create Policy.
- Create Post-Screening Policy dialog when using CipherOwl:
- Define policy criteria and action.
| Policy Criteria | Options | Description |
|---|---|---|
| Direction | • Inbound • Outbound | Transaction flow direction |
| Risk | When using CipherOwl: • Low • Medium • High | Risk classification from CipherOwl |
| Amount Range | • Min Amount • Max Amount | Transaction value range (in USD) |
| Decision | Effect on transaction |
|---|---|
| Approve | • Inbound: Release funds • Outbound: Allow to proceed |
| Approve with Alert | • Inbound: Release funds + notification • Outbound: Allow + notification |
| Reject | • Inbound: • Flag transactions and freeze funds • Note: If you are using the auto token sweeping feature of MPC Wallets, frozen funds will not be included in the sweep operation. • Outbound: Block transaction • Risk notification is always sent |
| Manual Review | • Inbound: Wait for manual review • Outbound: Wait for manual review Note: Manual review is manual assessment to determine whether to approve or reject it. It’s suitable for clients with sufficient compliance resources or those requiring more granular risk classification, allowing an additional review of transactions with unclear risk levels. The review result can be submitted via the WaaS API or through the Screening app interface. |
- Click Submit to enable the policy.
When Screening has the scan results:
- Due to overlap prevention rules, at most one policy will match any given transaction
- A policy matches when the transaction’s direction, risk level, and amount range match the policy’s criteria
- When a match is found, Screening executes that policy’s action
Overlap prevention rules
The system prevents creation of overlapping policies. A policy cannot be created if it has all of the following in common with an existing active policy:- Same direction (Inbound/Outbound)
- Same risk level
- Overlapping amount range
Edit policies
- Go to the Post-Screening Policies interface.
- Click
 next to the policy you want to edit.
 - On the Edit Post-Screening Policy dialog, make the necessary changes to the policy criteria and action (see Policy criteria and Policy actions).
- Click Submit.
The same overlap prevention rules apply when editing policies.
Delete policies
- Go to the Post-Screening Policies interface.
- Click
 next to the policy you want to delete.
 - On the Delete Policy dialog, click Yes to confirm deletion.