You are currently reading our Product Manuals, where you can find detailed information about our product features and usage instructions. For technical documentation and resources aimed at developers, please visit our Developer Hub.
What is Cobo Portal
Cobo Portal is an all-in-one platform designed to provide a secure and efficient way to manage your digital assets. With its battle-tested security architecture and unparalleled support for tokens and chains, Cobo Portal offers a range of crypto wallets to cater to your specific needs. Additionally, it offers a wide array of features including comprehensive risk controls, seamless access to Web3/DeFi networks, intuitive data dashboards, and a rich selection of both Cobo and third-party applications.
Cobo Portal is designed to serve various participants in the Web3 ecosystem:
- DeFi & staking funds, trading firms, institutional investors, and financial services: If you are looking for a secure storage solution for your digital assets, Cobo Portal enables you to create vaults and wallets and carry out daily transactions directly within the platform.
- Exchanges, crypto native firms, OTC & brokerages, and retail platforms: Cobo offers Wallet-as-a-Service (WaaS) APIs that allow you to integrate powerful wallet capabilities into your own applications. By utilizing Cobo Portal, you can easily set up your account, manage API keys, view API logs, and access a range of other essential functionalities.
- Web3 developers: Cobo Portal provides you with the opportunity to build and deploy additional functionalities as Cobo Portal Apps. These apps will empower digital asset businesses by equipping them with the necessary tools and resources to thrive in the Web3 landscape.
Key features
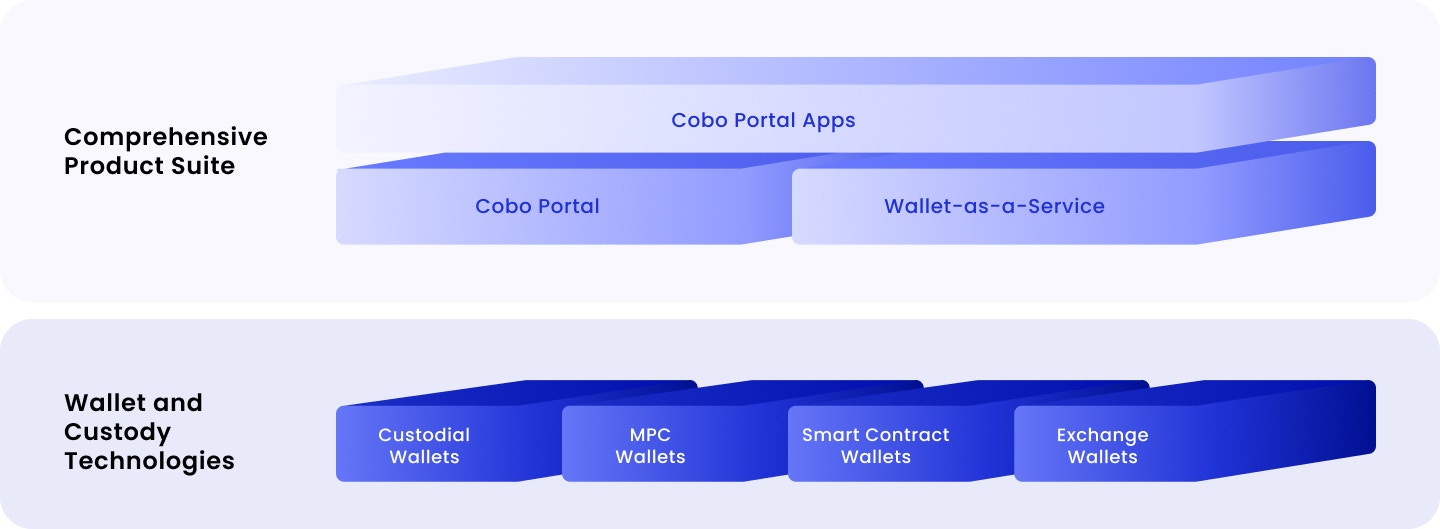
An all-in-one wallet platform
Cobo Portal combines all four wallet technologies in one platform with state-of-the-art security architecture and the industry’s widest coverage of chains and tokens (click here for supported chains and tokens).- Custodial Wallets: Custodial Wallets utilize advanced encryption techniques and risk control engines to ensure that your funds are protected against unauthorized access and potential attacks. It implements a robust 3-tier (hot-warm-cold) private key storage architecture with 95% of funds securely stored in cold wallets and only 5% in hot and warm wallets.
- MPC Wallets: Multi-Party Computation (MPC) is an advanced cryptographic technology utilized for key management on the blockchain. Cobo Portal offers two types of MPC Wallets: Organization-Controlled Wallets, providing organizations with complete control of their own funds or their end users’ assets, and User-Controlled Wallets, giving end users full control of their digital assets.
- Smart Contract Wallets: This wallet type supports a myriad of smart contract wallets, prominently featuring Safe{Wallet} alongside other account abstraction wallets. It also allows the flexibility to delegate an Externally Owned Accounts (EOA) wallet to interact seamlessly with the smart contract ecosystem.
- Exchange Wallets: Exchange Wallets are your one-stop solution for managing multiple exchange accounts effortlessly. It brings all of your exchange accounts together in a single, user-friendly interface, providing a seamless experience for viewing, monitoring, and managing your assets across various exchanges.
| Custodial Wallets | MPC Wallets | Smart Contract Wallets | Exchange Wallets | |
|---|---|---|---|---|
| Main benefits |
|
|
|
|
| Typical customers | Users seeking ease of use and convenience, and those who prefer having a trusted specialist handle the security of their wallet. | Users who want more control over their private keys and assets and privacy, and those who prefer a more decentralized approach to custody. | Users who prefer non-custodial wallets powered by smart contracts, and those who seek transparency, automation, programmability, and on-chain role-based access controls. | Users who trade on centralized exchanges but aim to manage exchange counterparty exposure and minimize the risk of leaving assets on exchanges. |
| Key storage and signature | Private keys are managed solely by Cobo. Transactions are approved by you and then signed by Cobo. | Private keys are secured in a non-custodial MPC setup, distributed across “m out of n” key shares. No single party — including Cobo — holds the complete private key or can unilaterally sign transactions. | Private keys are safely stored in smart contracts and multiple signatures are required to sign transactions or messages. For higher efficiency, single-signature operations can be performed by pre-authorized delegates. | Cobo retains your API keys, allowing for the operation of your exchange accounts through Cobo Portal. |
| Chain support | 70+ chains, 2,000+ tokens | 30+ chains, 2,000+ tokens | 9 chains | Dependent on the corresponding exchanges |
| KYC | Required | Not required for Starter and Standard plans | Not required | Not required |