- Deposit USD or stablecoins
- Deposit gas tokens
- Set up gas fee payment preferences
Deposit USD or stablecoins
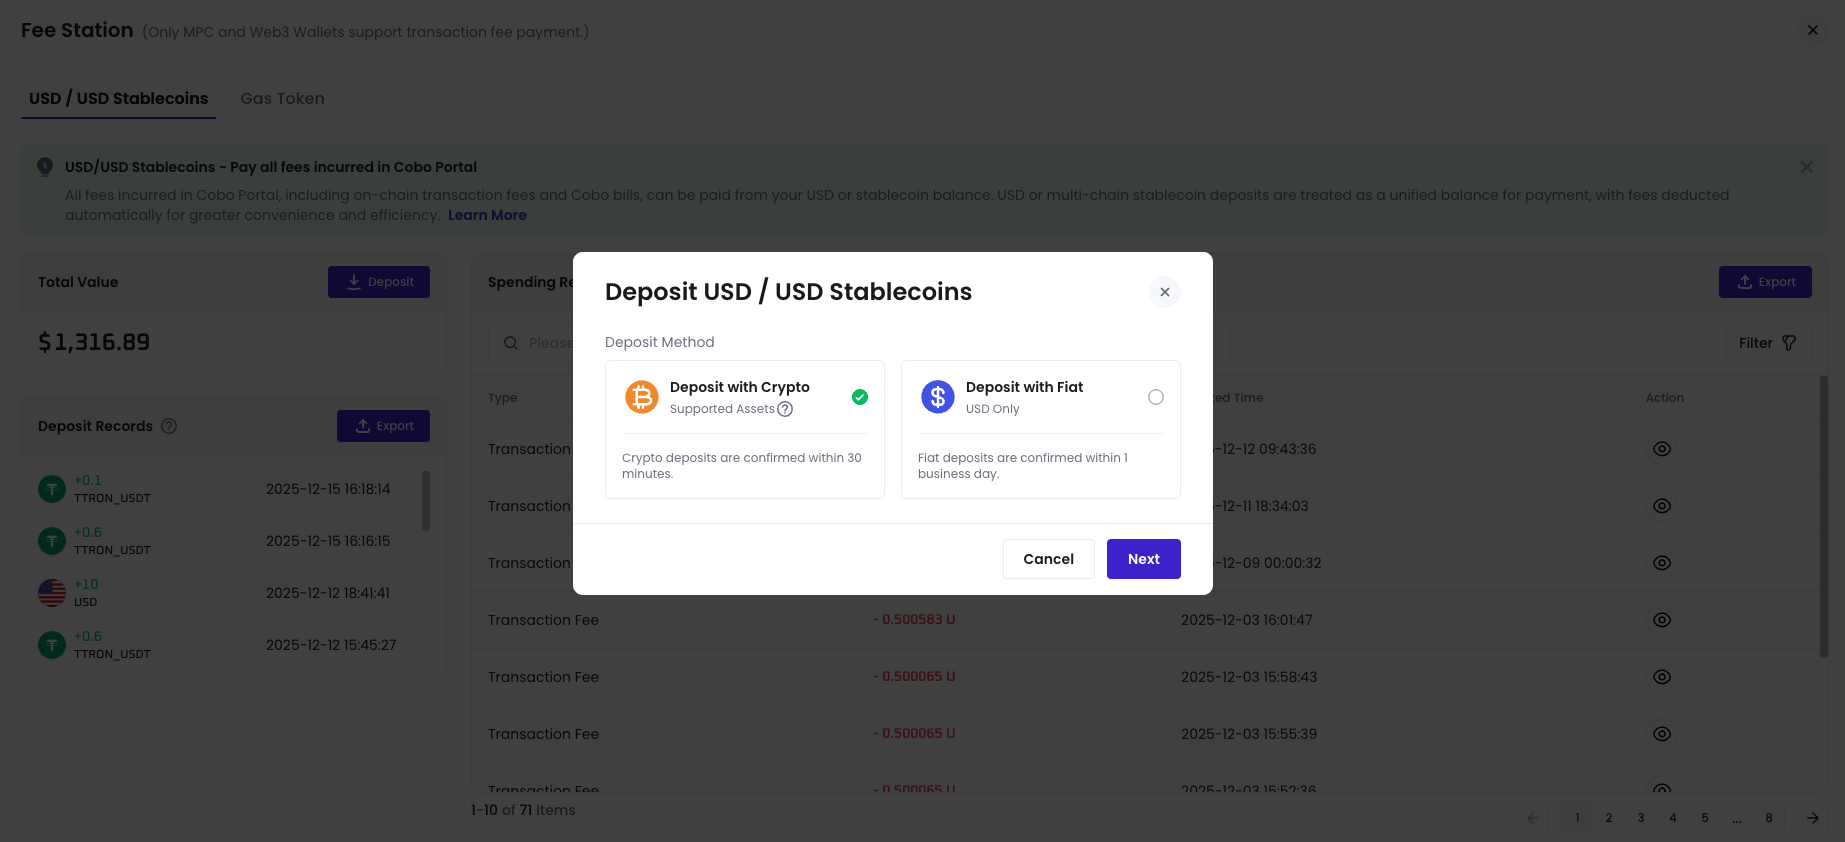
Fee Station supports deposits in fiat USD or USD stablecoins. After deposit, these funds can be used in Fee Station to pay for gas fees, platform service fees, and custody fees. In the USD / USD stablecoin tab, you can view your current balance, deposit history, and spending records, and initiate new deposits. For supported stablecoin types, refer to Supported Token Types.- Log into Cobo Portal.
- You can access it by clicking Fee Station in the left sidebar.
-
In the USD / USD stablecoin tab, next to Total Value, click Deposit, choose a suitable deposit method, and follow the on-screen instructions to complete the deposit.
Deposit gas tokens
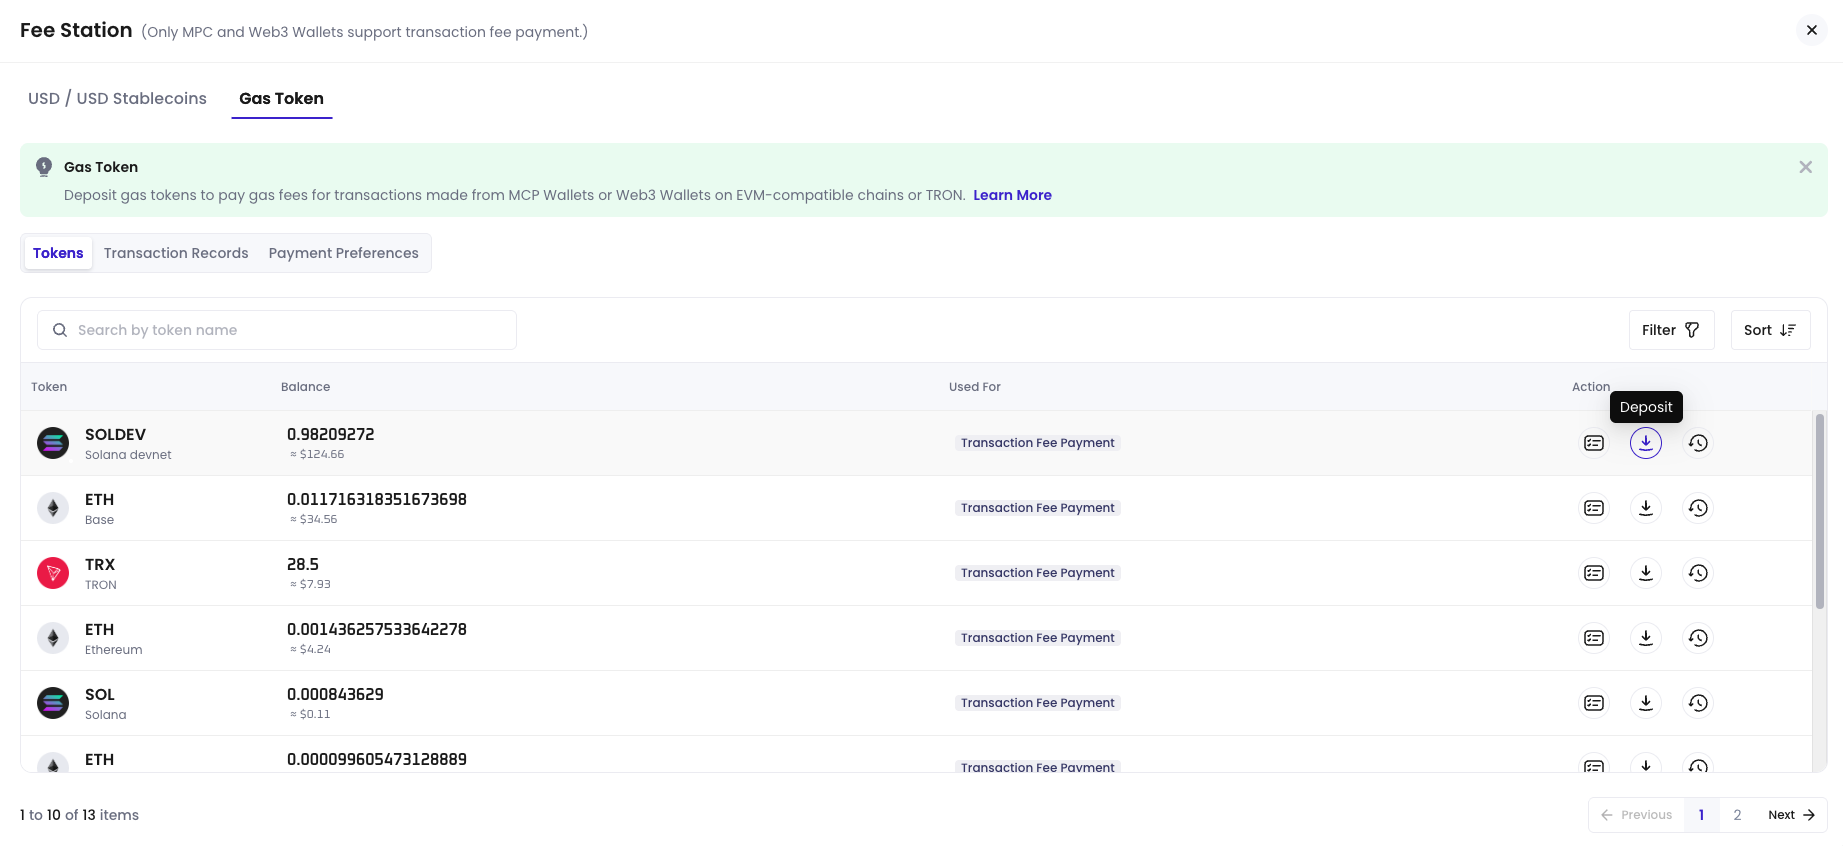
You can also deposit native gas tokens on each supported chain, which can be used to cover gas fees on those chains. In the Gas Token tab, you can view the balance and transaction records of gas tokens on each chain and initiate deposits. For supported gas tokens, refer to Supported Token Types.- Log into Cobo Portal.
- You can access it by clicking Fee Station in the left sidebar.
- Switch to the Gas Token tab and find the gas token for the target chain (for example, TRX, ETH, or MATIC).
-
Click the
 deposit icon next to the gas token, and follow the instructions to complete the deposit.
Configure payment preferences
In the Gas Token > Payment Preferences tab, you can configure on-chain transaction fee payment strategies for MPC Wallets and Web3 Wallets based on supported chains.
Whitelist-based fee configurations may apply to specific addresses. As a result, the fee behavior for those addresses can differ from the preference you set here, and changing an address’s whitelist membership can change which fee behavior applies.
TRON fee payment
For TRON USDT transfers, Fee Station pays the on-chain fee in one of two ways:- Energy mode: Fee Station uses available or rented energy on the sending address to cover the transfer, which avoids burning TRX and is the lower-cost option. Fee Station prioritizes this mode whenever energy can be applied.
- TRX burn mode: When energy cannot be applied to the transfer, Fee Station pays the fee by burning TRX, which costs more than energy mode.
If you have pre-rented energy on a TRON sending address but still see a TRON insufficient-energy or insufficient-fee error, confirm that Fee Station is enabled and funded for TRON and that a TRON payment preference is configured under Gas Token > Payment Preferences. If the error persists after the Fee Station balance is funded, the address may require additional account configuration before pre-rented energy can be applied.