> ## Documentation Index
> Fetch the complete documentation index at: https://manuals.cobo.com/llms.txt
> Use this file to discover all available pages before exploring further.
# Set up message signing policy
> Learn the steps to set up message signing policies in Cobo Portal.
Transaction policies are an important security measure for your organization. It is recommended to strictly configure these policies, especially for large withdrawal scenarios, to avoid high-risk situations such as having no transaction policies, having transactions that are not covered by a transaction policy, automatically approving all transactions, or allowing the same role to both withdraw and approve transactions.
The following documentation explains how to set up message signing policies with the **Initiators**, **Message Types**, or **EIP-712 Message Content** conditions. For Safe\{Wallet} message signing policies, see [Risk controls for Safe\{Wallet} message signing](/en/portal/risk-controls/safe-risk-controls).
## Create a message signing policy
1. Log into [Cobo Portal](https://portal.cobo.com/login).
2. Click **Transaction Policies** in the left sidebar.
3. Click **Create Policy** > **Message Signing**.
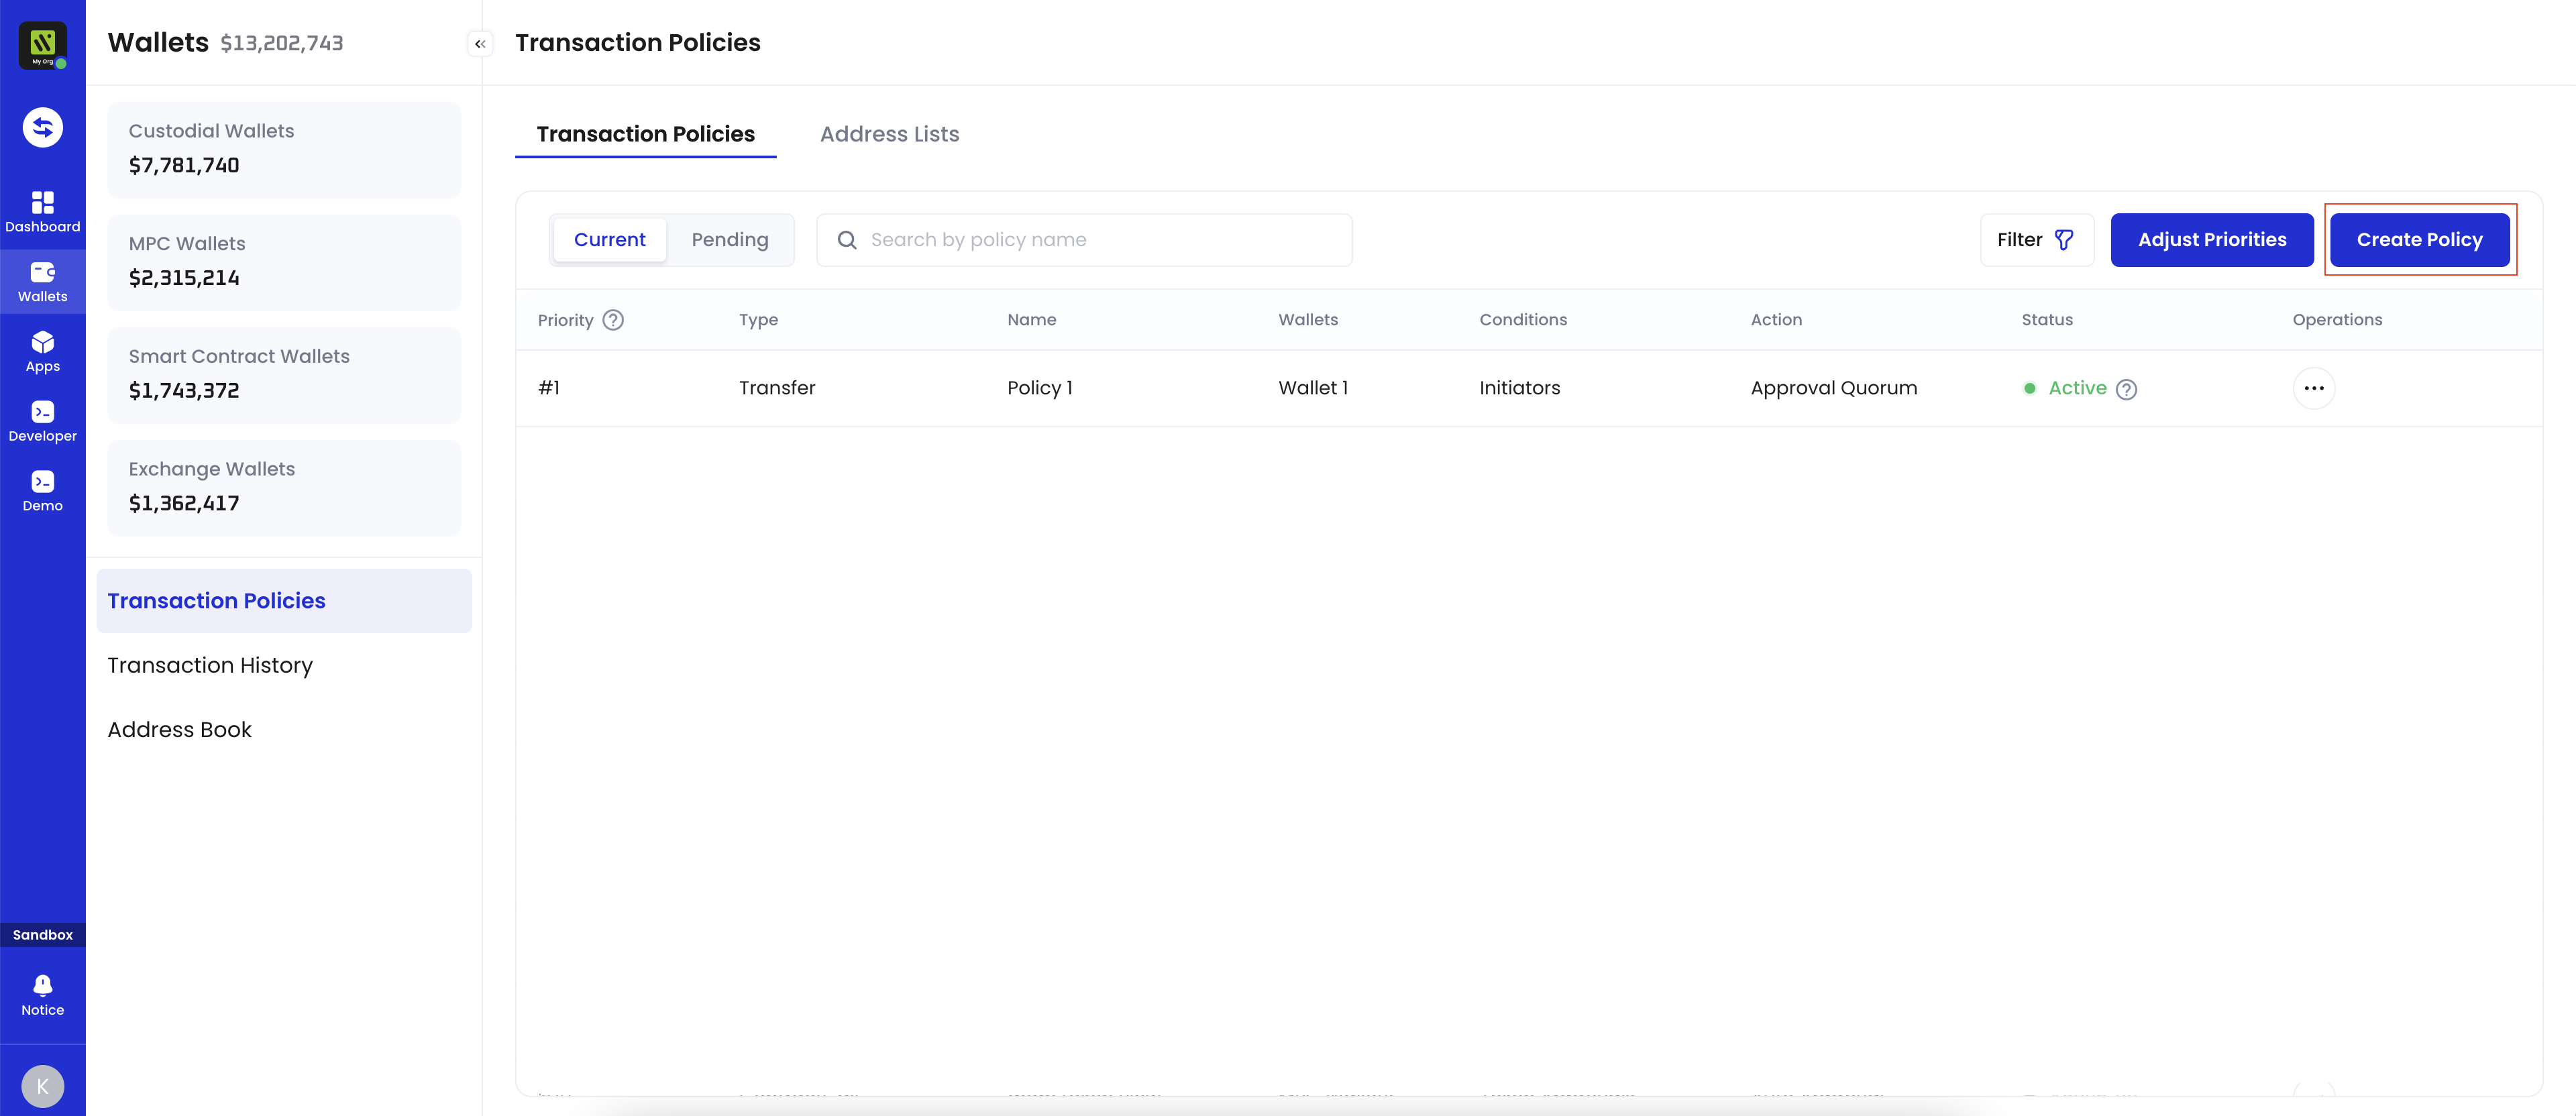 4. On the **Create Message Signing Policy** page, enter a **Policy Name**. The name should not exceed 30 characters.
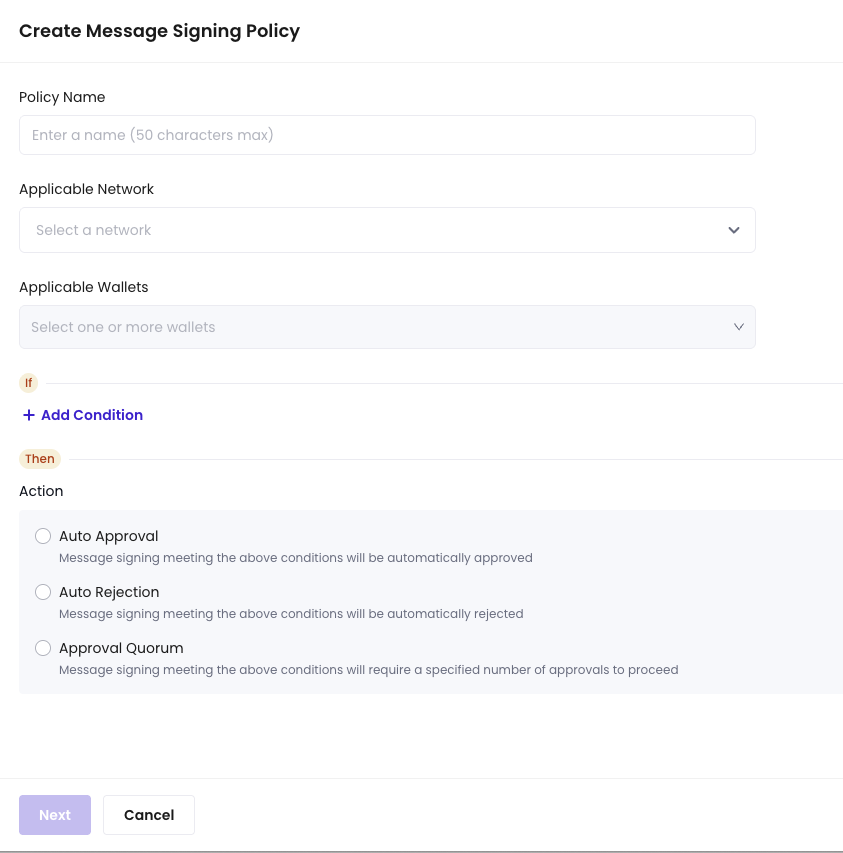 5. Select applicable networks.
6. Select the wallets under **Applicable Wallets** that are applicable to the policy you are about to create. Select addresses. The following wallet types support message signing policies:
* Custodial Wallets
* Web3 Wallets
* MPC Wallets
* Organization-Controlled Wallets
* User-Controlled Wallets
You can also specify addresses under the selected wallets as applicable addresses for the policy.
7. Under **If**, click **+ Add Condition** to select a condition template. You can add one or more conditions to each policy. If multiple conditions are applied, the policy will be triggered only if the request satisfies all conditions.
You can combine multiple field checks in a single policy. The matching logic is **AND**: the policy is triggered only when all configured checks are satisfied.
For the condition **Safe\{Wallet} message signing**, see [Risk controls for Safe\{Wallet} message signing](/en/portal/risk-controls/safe-risk-controls).
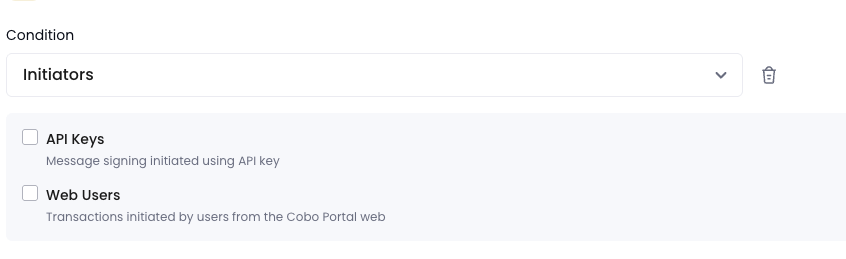
**Initiators**: The policy will be triggered only if the request is initiated by selected entities.
5. Select applicable networks.
6. Select the wallets under **Applicable Wallets** that are applicable to the policy you are about to create. Select addresses. The following wallet types support message signing policies:
* Custodial Wallets
* Web3 Wallets
* MPC Wallets
* Organization-Controlled Wallets
* User-Controlled Wallets
You can also specify addresses under the selected wallets as applicable addresses for the policy.
7. Under **If**, click **+ Add Condition** to select a condition template. You can add one or more conditions to each policy. If multiple conditions are applied, the policy will be triggered only if the request satisfies all conditions.
You can combine multiple field checks in a single policy. The matching logic is **AND**: the policy is triggered only when all configured checks are satisfied.
For the condition **Safe\{Wallet} message signing**, see [Risk controls for Safe\{Wallet} message signing](/en/portal/risk-controls/safe-risk-controls).
**Initiators**: The policy will be triggered only if the request is initiated by selected entities.
 **Message Types**: The policy will be triggered only if the message type is selected.
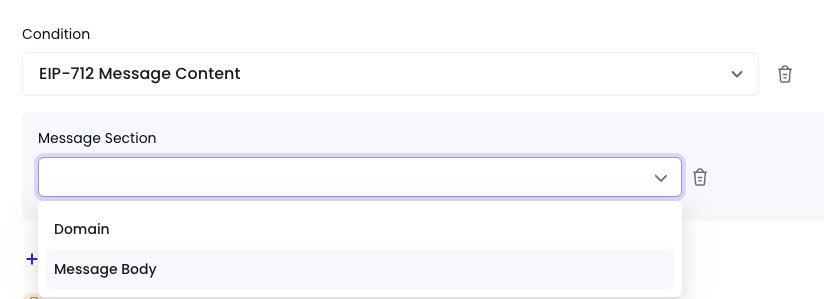
 **EIP-712 Message Content**: The policy will be triggered only when an EIP-712 signing request matches the rule you configure. This condition allows you to perform fine-grained checks on the EIP-712 domain and message body to better control signing risk.
You can configure **EIP-712 Message Content** only when you select EVM networks as applicable networks.
**EIP-712 Message Content**: The policy will be triggered only when an EIP-712 signing request matches the rule you configure. This condition allows you to perform fine-grained checks on the EIP-712 domain and message body to better control signing risk.
You can configure **EIP-712 Message Content** only when you select EVM networks as applicable networks.
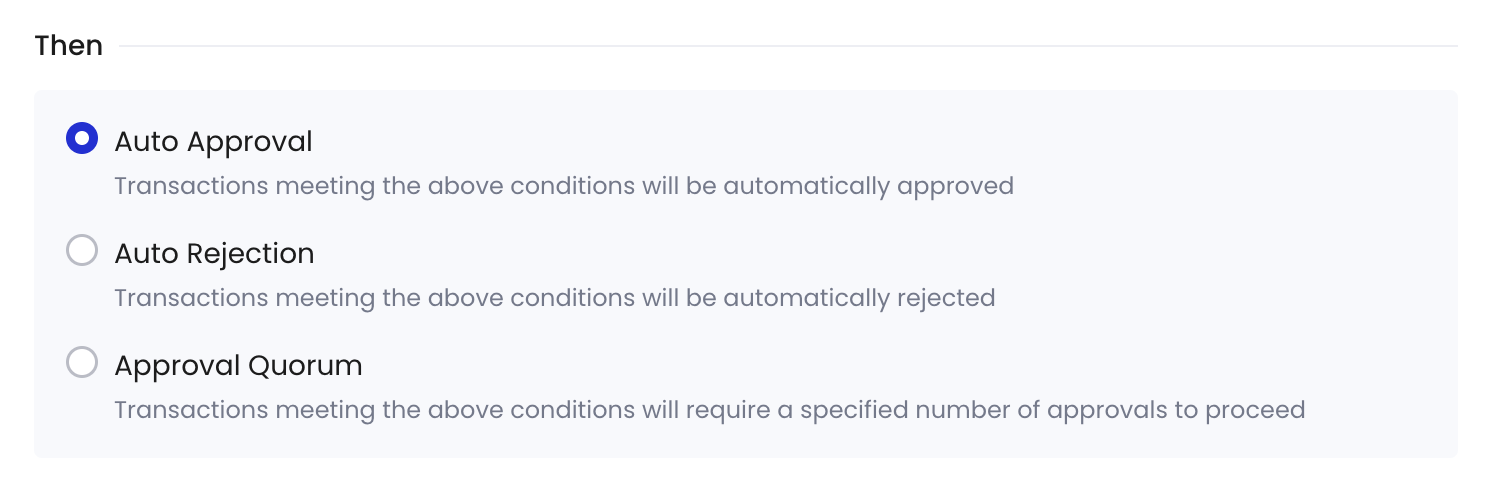
 8. Under **Then**, select the action to be taken if the policy is triggered (i.e., **Auto Approval**, **Auto Rejection**, and **Approval Quorum**), then click **Next**.
* **Auto Approval**: Requests meeting the above conditions will be automatically approved.
* **Auto Rejection**: Requests meeting the above conditions will be automatically rejected.
* **Approval Quorum**: Requests meeting the above conditions will require a specified number of approvals to proceed. Click **+ Select Approvers** to add one or more team members as approvers. You can select by **User Roles** or **Users**. Then, set the approval quorum.
8. Under **Then**, select the action to be taken if the policy is triggered (i.e., **Auto Approval**, **Auto Rejection**, and **Approval Quorum**), then click **Next**.
* **Auto Approval**: Requests meeting the above conditions will be automatically approved.
* **Auto Rejection**: Requests meeting the above conditions will be automatically rejected.
* **Approval Quorum**: Requests meeting the above conditions will require a specified number of approvals to proceed. Click **+ Select Approvers** to add one or more team members as approvers. You can select by **User Roles** or **Users**. Then, set the approval quorum.
 9. Review the policy you just configured, then click **Next**.
10. Review the order of your policies. Transactions will be matched with policies in the list based on their priority order.
* Once a higher-priority policy is triggered, subsequent policies will no longer be triggered.
* By default, the newly created policy will be placed at the top of the policy list and highlighted. You can change the order by dragging and dropping.
11. Click **Submit** and complete the 2FA verification.
Depending on your organization's governance policies, an approval workflow may be triggered. After approval, the message signing policy will take effect.
9. Review the policy you just configured, then click **Next**.
10. Review the order of your policies. Transactions will be matched with policies in the list based on their priority order.
* Once a higher-priority policy is triggered, subsequent policies will no longer be triggered.
* By default, the newly created policy will be placed at the top of the policy list and highlighted. You can change the order by dragging and dropping.
11. Click **Submit** and complete the 2FA verification.
Depending on your organization's governance policies, an approval workflow may be triggered. After approval, the message signing policy will take effect.