> ## Documentation Index
> Fetch the complete documentation index at: https://manuals.cobo.com/llms.txt
> Use this file to discover all available pages before exploring further.
# Interact with dApps through Cobo Connect
> A guide on how to interact with decentralized applications (DApps) using Cobo Connect, enhancing your cryptocurrency experience with innovative tools.
We recommend using [WalletConnect](/en/walletconnect/introduction) whenever possible for better multi-chain support and overall user experience. Cobo Connect will be gradually phased out based on actual usage and will remain available during the transition period.
Before using Cobo Connect to interact with dApps, ensure that you have completed the steps in [Set up Cobo Connect](/en/cobo-connect/set-up).
## Initiate a transaction or sign a message
Before initiating a transaction or signing a message on a dApp website, you need to connect your wallets. Many dApp websites have a **Connect** or **Connect wallets** button. Click the button and choose Cobo Connect as your wallet service. Select from Cobo Connect the Cobo Portal wallet addresses you want to use on the dApp website.
When you initiate a transaction (for example, swapping tokens) or sign a message on the dApp site, Cobo Connect will open a window that displays the details. Review the information, then click **Confirm**.
Meet the following prerequisites to successfully initiate the process.
* Select the correct network
If the network you select is not supported by the current account in Cobo Connect, you will be prompted to switch to another network.
* Log in to Cobo Portal
If you haven't logged in to Cobo Portal, you will be redirected to Cobo Portal. The Cobo Connect window will close after redirection. After logging in, you need to initiate the process again.
* Set up [Portal Mobile](/en/portal-mobile/introduction)
You will be prompted to confirm the action on Portal Mobile. If you haven't set up Portal Mobile, you will be redirected to Cobo Portal. The Cobo Connect window will close after redirection. After setting up Portal Mobile, you need to initiate the process again.
## Complete the transaction or signing process
After you've successfully initiated the transaction or signing process, confirm the action on Portal Mobile.
Cobo Connect checks if you have the permission to interact with dApps using [MPC Wallets](/en/portal/mpc-wallets/introduction), [Web3 Wallets](/en/portal/custodial-wallets/web3-wallets/set-up), or [Smart Contract Wallets](/en/portal/smart-contract-wallets/introduction). If you don't have the [Spender](/en/portal/organization/roles-and-permissions) role, the action will be rejected and not proceed to the next step.
If you have the required permission, the transaction or message signing will proceed according to pre-configured [risk control policies](/en/portal/risk-controls/introduction). If an approval flow is required, you can view the response from each approver in Cobo Connect.
If not restricted by risk control policies and no approval is required, the transaction will go on-chain, or the message will be signed directly.
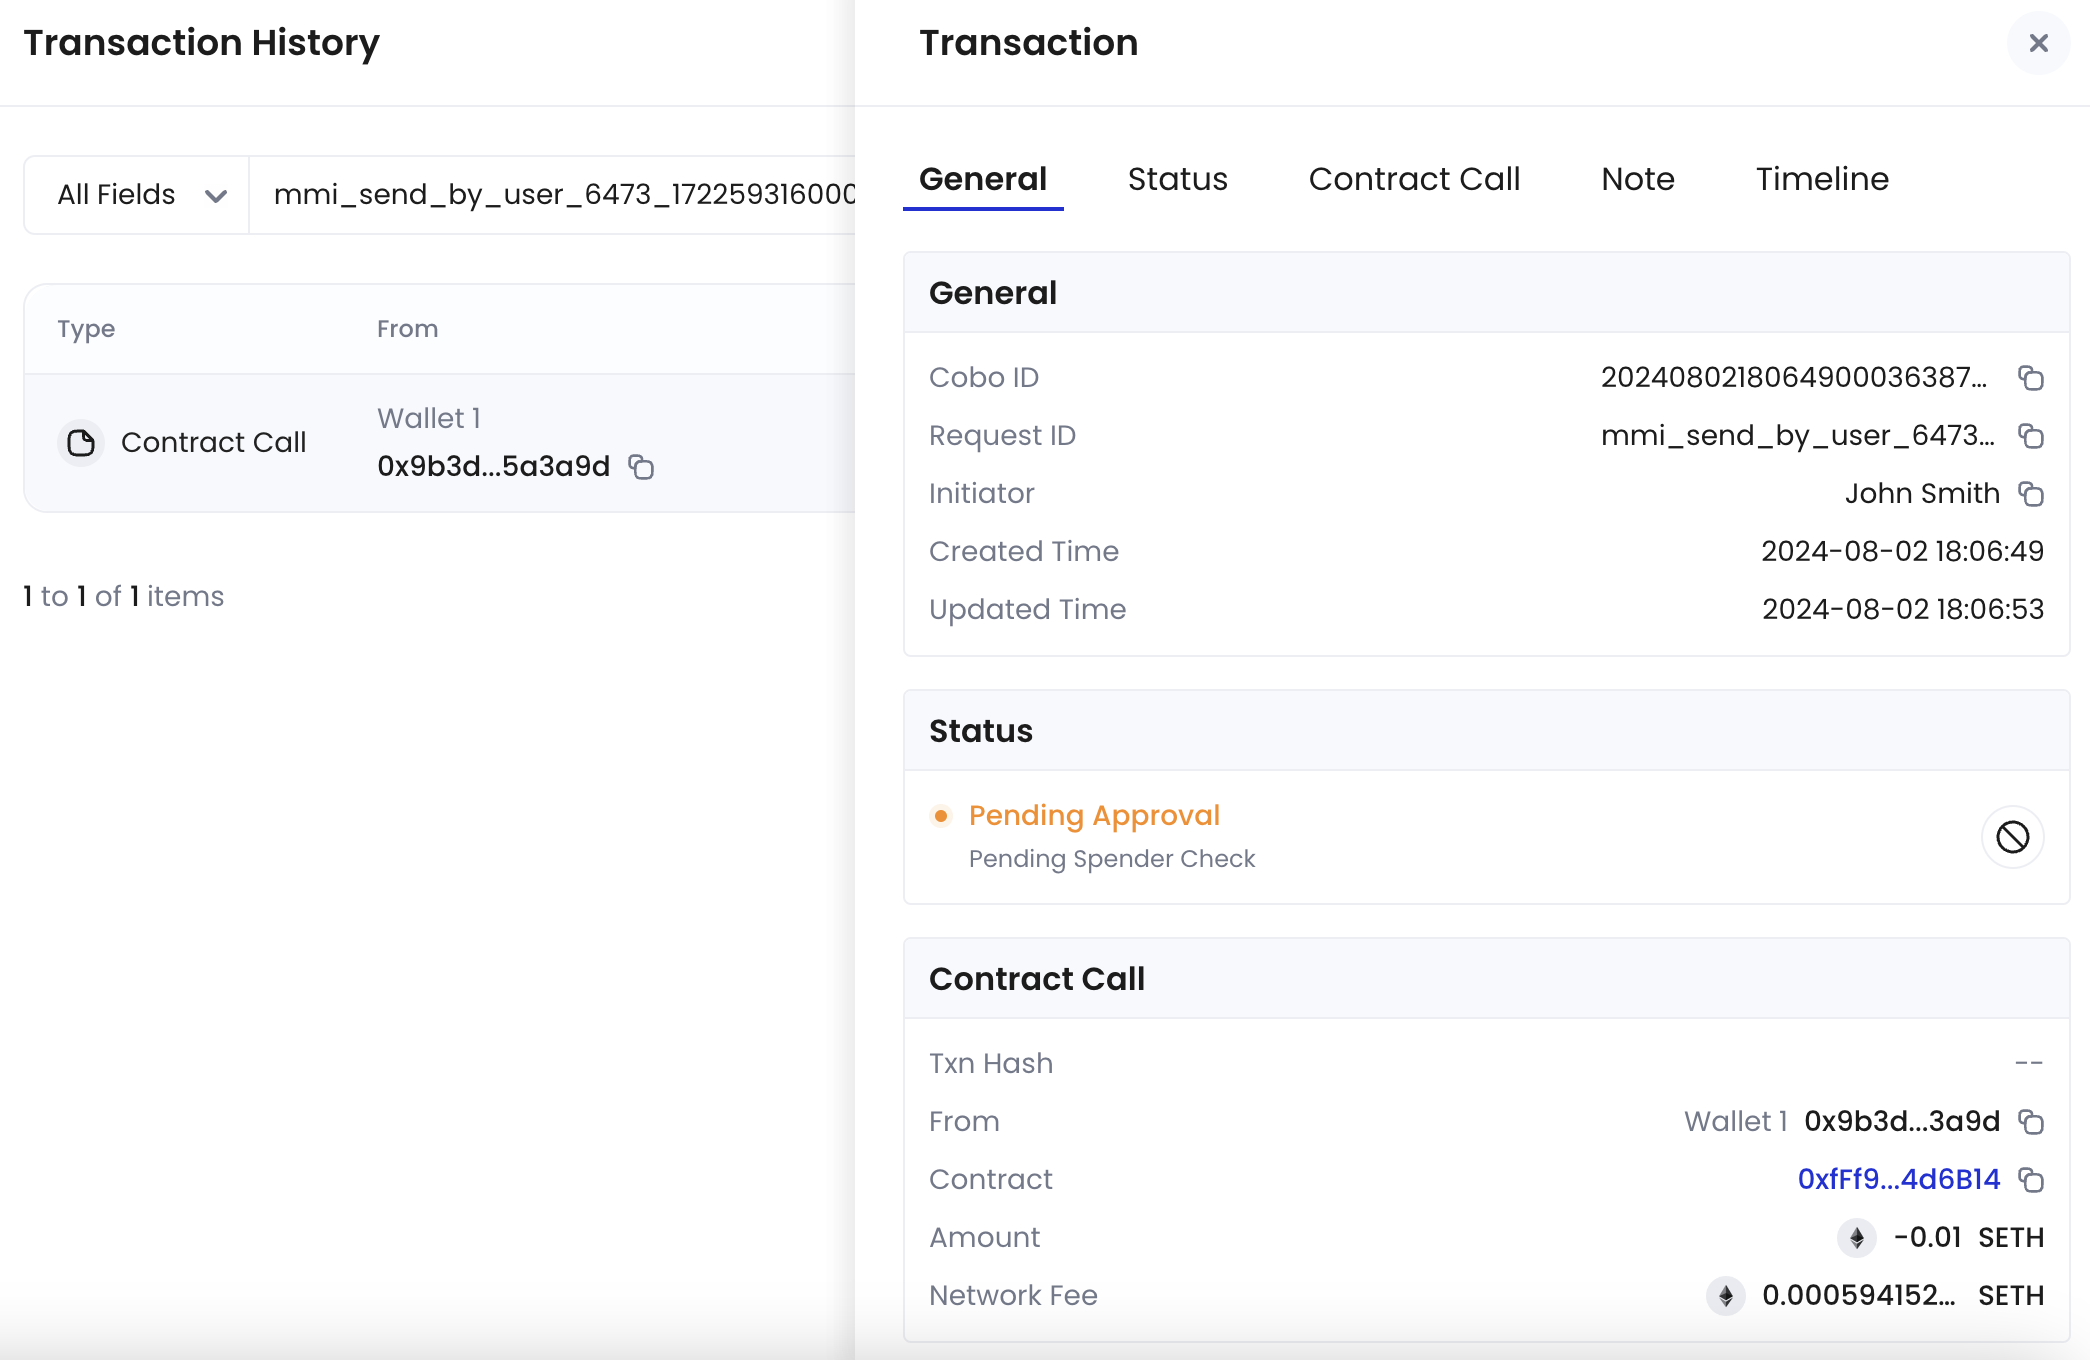
You can view the status of the transaction in the **Activity** tab in Cobo Connect. To view more details, click the activity, then click the request ID (blue hyperlinked text) to open the **Transaction History** page in Cobo Portal. Click  to view the transaction details as shown in the following screenshot.
 ## Example: Interact with Hyperliquid
This section shows how to connect your wallet to a dApp using Cobo Connect, with Hyperliquid as the example.
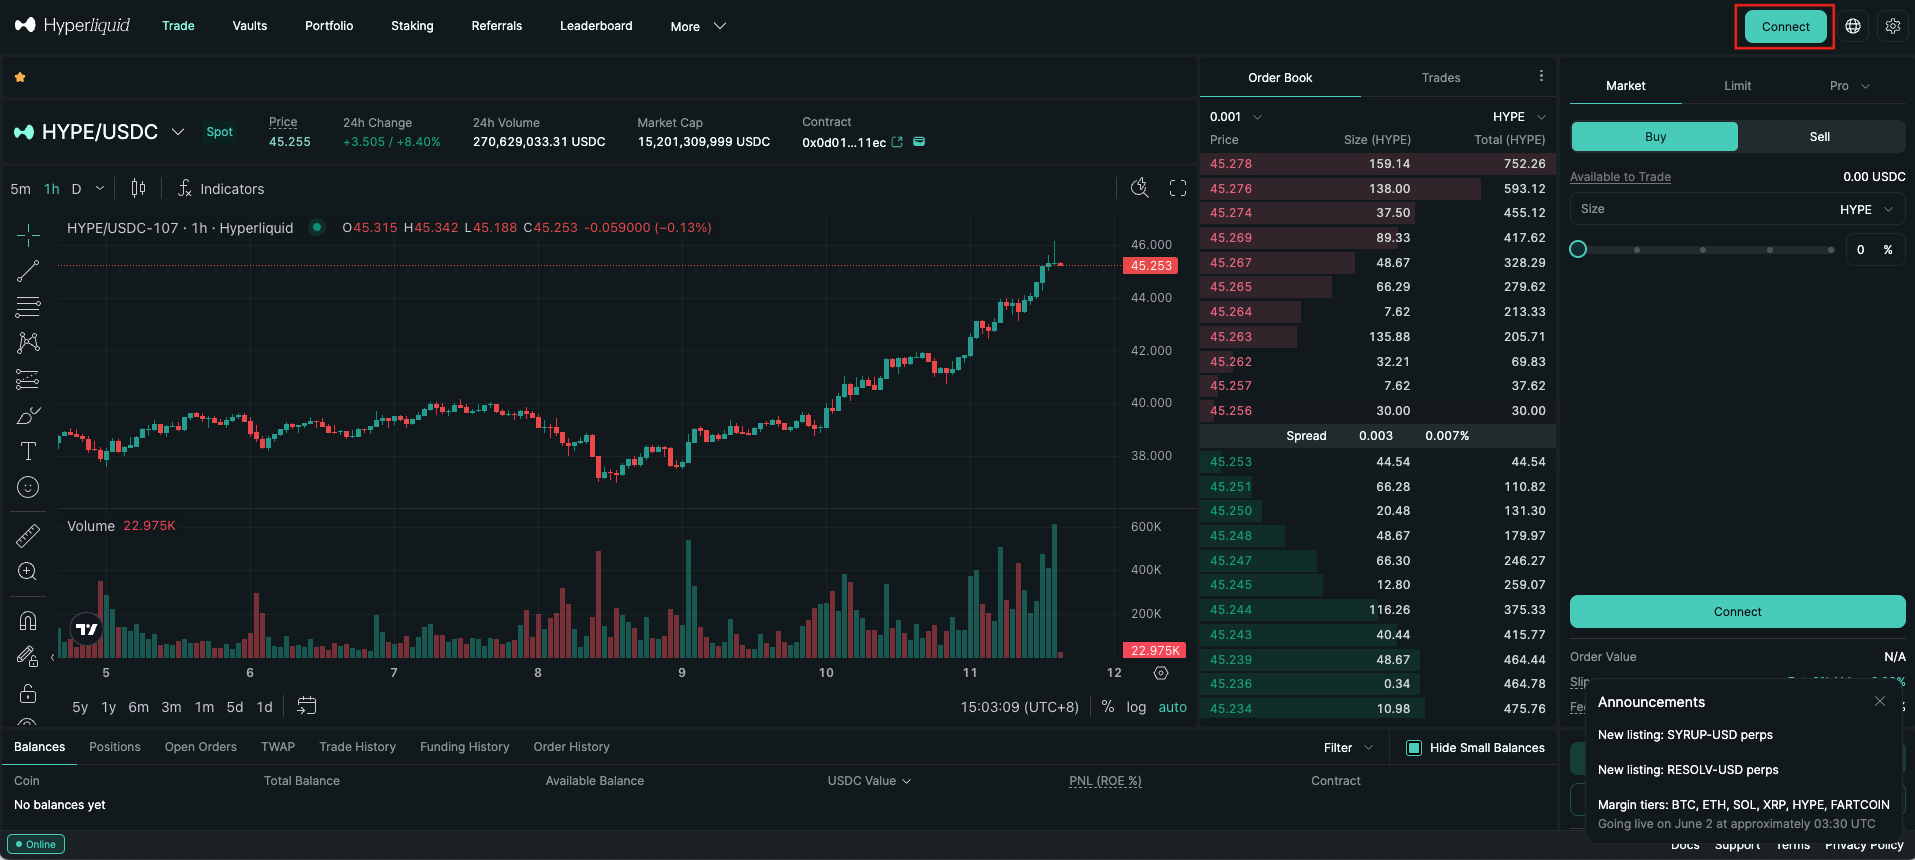
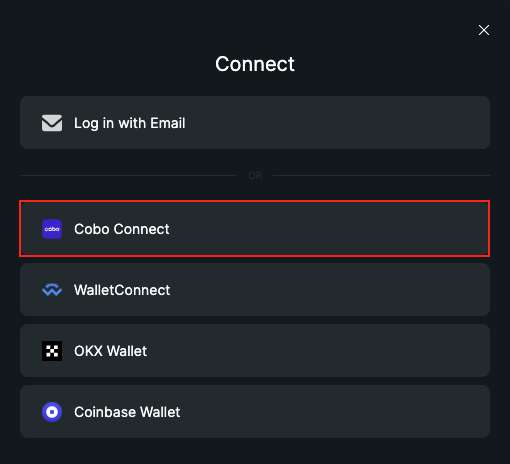
1. On the [Hyperliquid](https://app.hyperliquid.xyz/) page, click **Connect** in the top-right corner, then select **Cobo Connect** in the pop-up dialog.
## Example: Interact with Hyperliquid
This section shows how to connect your wallet to a dApp using Cobo Connect, with Hyperliquid as the example.
1. On the [Hyperliquid](https://app.hyperliquid.xyz/) page, click **Connect** in the top-right corner, then select **Cobo Connect** in the pop-up dialog.
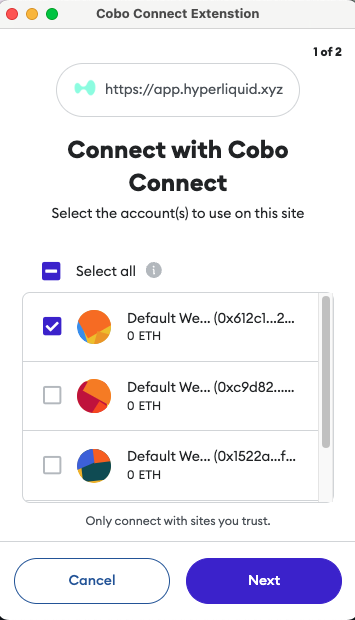
 2. In the **Cobo Connect Extension** pop-up dialog, select the Cobo Portal wallet addresses you want to use on Hyperliquid, then click **Next**.
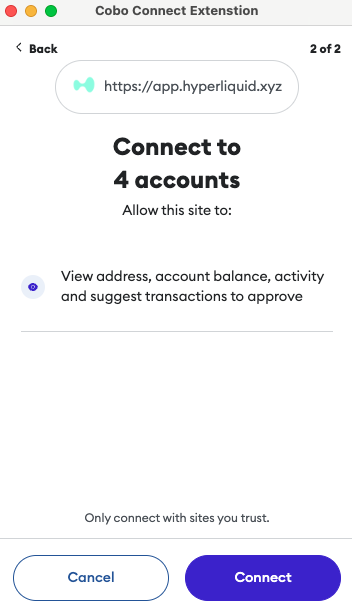
 3. Click **Connect** to proceed.
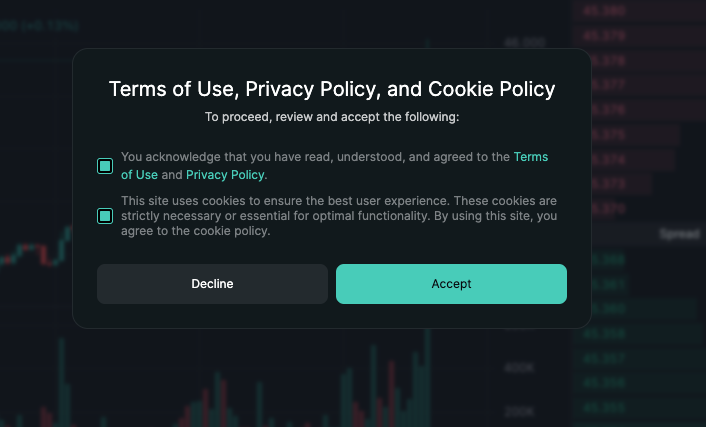
 4. On the Hyperliquid page, review the terms and policies, then click **Accept** to continue.
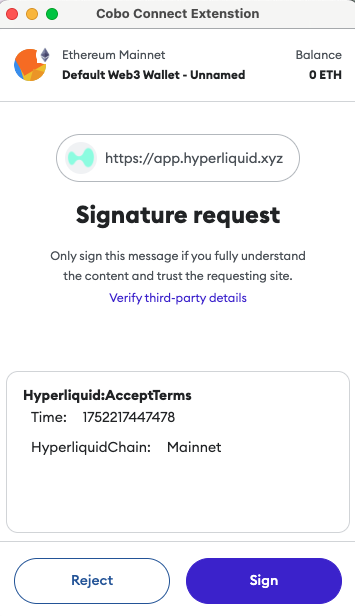
 5. In the **Cobo Connect Extension** dialog, review the signature request details, then click **Sign**.
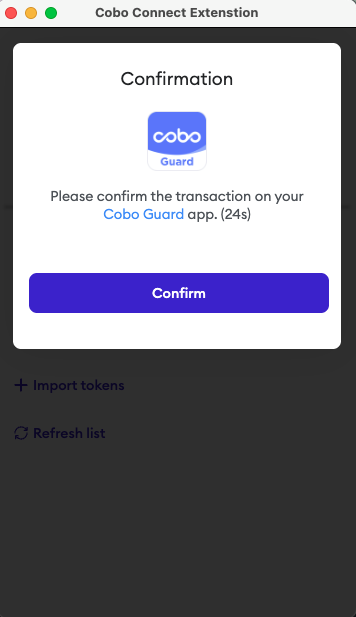
 6. The Cobo Connect Extension dialog will prompt you to confirm the transaction in Portal Mobile. Open Portal Mobile and approve the request.
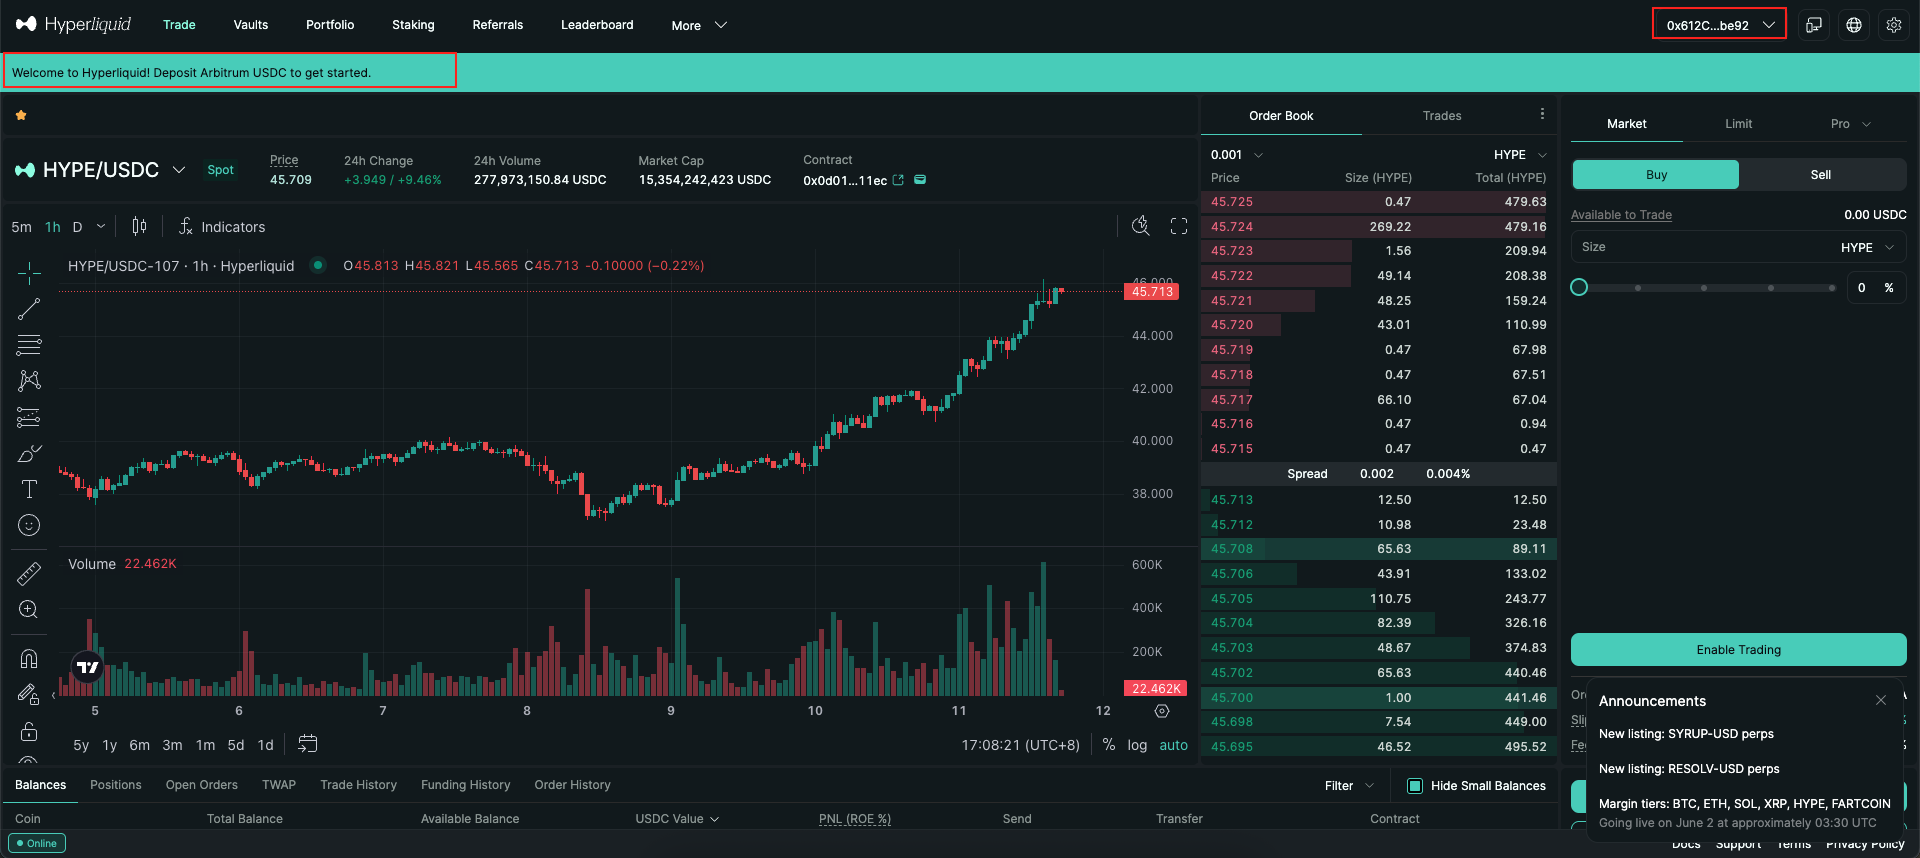
 Once the request is approved, you will be redirected to the Hyperliquid homepage. A welcome message will appear at the top. You can now use your Cobo wallets to interact with Hyperliquid.